The ERP includes an overlay that provides users with relevant information.
This overlay acts as a contextual guide, offering step-by-step directions, tips, and explanations, relevant to the task or module currently being accessed. Designed to enhance user experience and reduce the learning curve, the overlay ensures that users can quickly understand what elements within the ERP mean and complete their work efficiently without needing to consult external manuals or other support resources. If no documents are available for the current section of the ERP, pages, tagged as general info will be loaded. #### Use The ERP manual can be accessed through the "**Help**" button in the menu, or by opening it through the shortcuts menu.The manual overlay can also by accessed by pressing the "**F1**" key.
When opening the manual, pages, relevant to your current location within the ERP are loaded first, but searching through the manual's pages is possible. Once a page is selected, it appears on the right side. With the page loaded, additional buttons appear in the upper right corner of the page. **"Open in new window",** which allows you to reopen current page in a new browser window and **"Export to PDF",** which exports the current page to a PDF file and downloads it automatically.  Once the overlay load, all sections within the ERP are listed on the left. These "books" can be opened to display chapters that pertain to separate ERP sections.The manual list is composed in a similar way to the actual menu to make finding relevant information easier.
 #### Sharing documents The ERP manual is designed for easy access with only the url. If you receive an url, like **erp.link.com/?help=true&page=117,** then the overlay will open as soon as the page loads and display the page, corresponding to the given page number.  # Access & authorizationUsers are mainly granted access through **permissions,** **roles** (groups of permissions) or with **specific authorizations.**
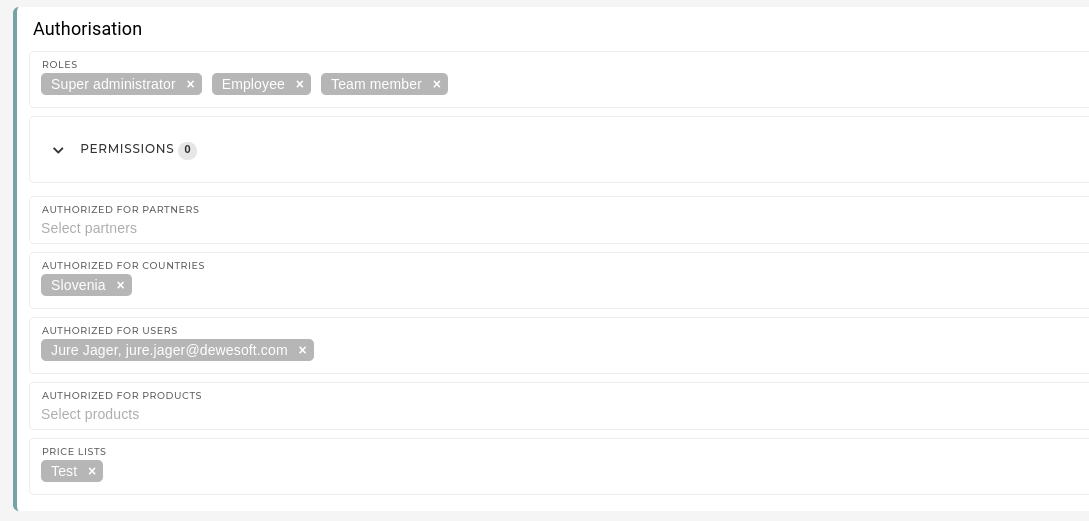 #### Permissions Users are granted access primarily through permissions. Permissions control access of most aspects of the ERP system, which include what pages can be visited, what types of entries can be viewed / deleted / created, which links are displayed in the menu...  Regular permissions provide complete access, while permissions with the "authorized" suffix grant limited access only to authorized content. Main types of permissions, that exist for each table, are **Create**, **View**, **Update**, **Delete**, and **Menu**. #### RolesRoles are primarily used to group permissions, that are often assigned together under a single name to ease authorization management.
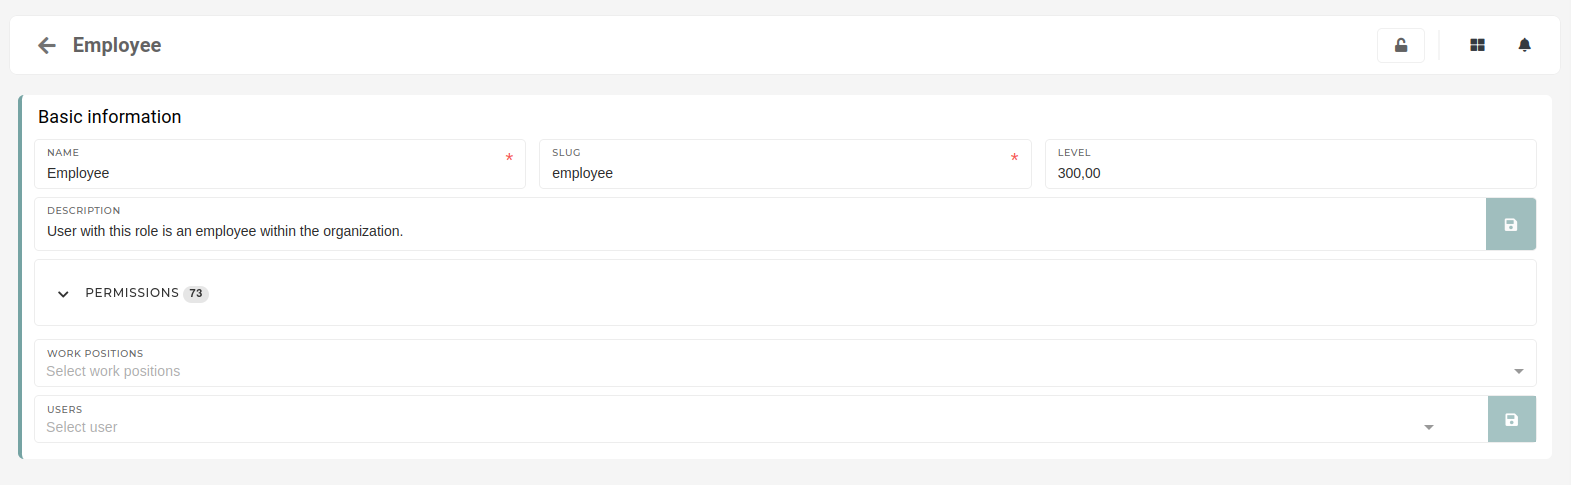 They can also be used in an informational manner, to essentially "**tag**" a user as for example, an employee or a shop customer. Roles can be assigned directly onto users or to their active work positions, defined within the HR module. # Go To Menu The two icons above navigation in menu are used for quicker navigation through the ERP and for globally searching through it's data. 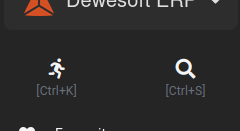 Clicking the "running man" button opens up an overlay, where you can search through available ERP pages to find, where you want to go quicker. This overlay can also be opened by pressing the " **CTRL + K** " shortcut.
# Global search The two icons above navigation in menu are used for quicker navigation through the ERP and for globally searching through it's data.  Clicking the magnifying glass button opens up the global search overlay, where you can search for items by document numbers, names, ... Global search can also be opened by pressing the "**CTRL + S**" shortcut.
#### Search history Global search provides a short **search history,** that can help you find your past searches, when you need them.  Past searches are filtered during search to show searches that best match you current search.You can toggle search history by clicking the "**clock**" icon on the right side of the screen.
#### Customize your global search Users can customize their global search by clicking the "**cog**" icon on the right side of the screen.  Clicking this icon displays a list of available search results. Each of these can be added to your global search panel by clicking on them. Users can also remove all result sections at once by clicking the **"Clear all"** button.Selected sections in search result always show only authorized data. If some of the sections remain empty during search, it could be that there are no results that match your search or you don't have authorization for .
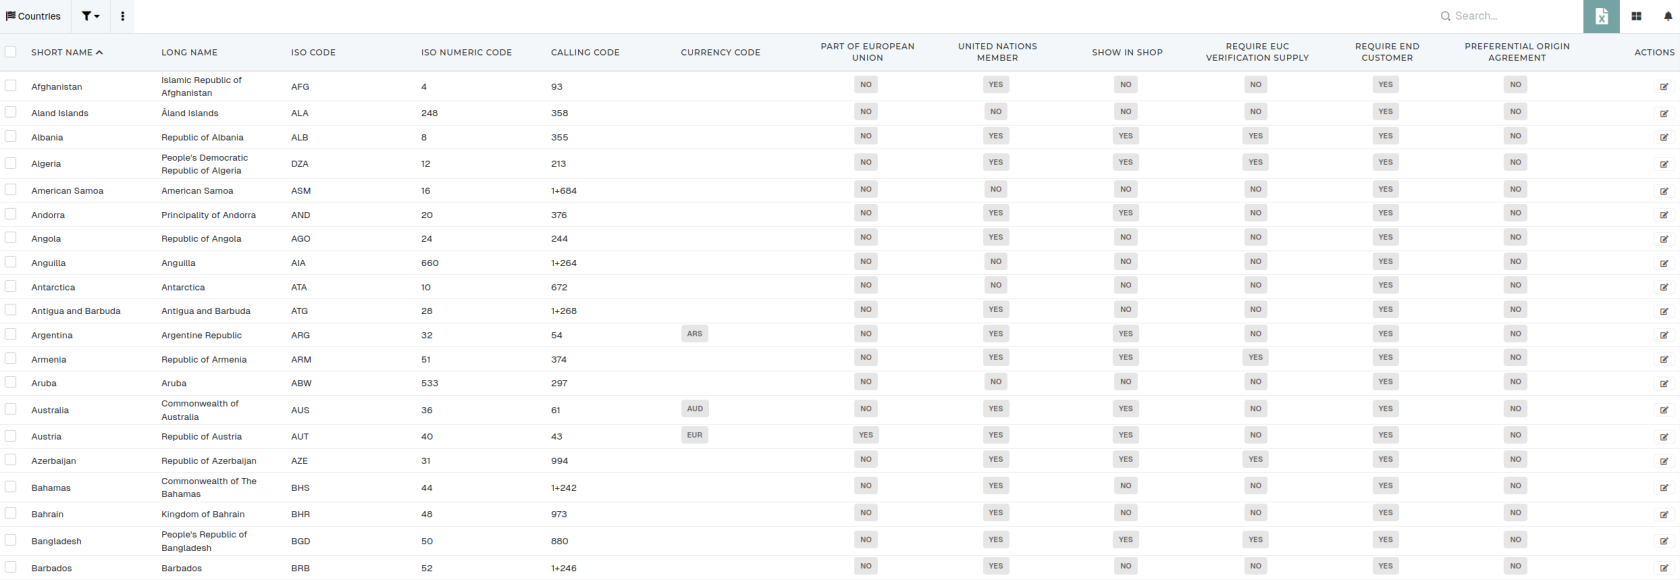
# TablesTable pages consist of the filters, table actions, table headers, table rows and pagination.
 ### Table columns You can customize the way you see a table, by opening the "visible columns" section and selecting or deselecting, which columns should be visible.After changing the visible columns selection, the table needs to be refreshed.
 Some tables have a lot of columns, so searching was added to allow you to quickly find the column you need.  ### Table filters Most table columns can be used in filters. When you click the **"funnel"** icon next to the column name, a filtering form is added to the filters section.Filters include text filters, dropdowns, Yes/No filters, date filters,...
After every change in the filters section, the filters need to be re-applied.
When you have applied filters, their count will appear next to the **"gear"** icon.
### Table search Table search allows for quick and simple searching by word through the entire table. If you have **applied table filters** and you **use table search,** the search will only find **records** that **match both** filters and search. If a record is not shown in table during search, it has to be saved through the update form again.
### Table actionsEvery table has **action buttons,** that are used to **add, delete, print, export or import records** in table.
 - **Add new** - Link to the create form the a new record. - **Import from Excel/CSV file** - Upload a formatted excel or CSV file to import records. - **Export to Excel** - Export table to Excel. This action **uses applied filters and search** during export. - If no filters are applied, this action will attempt to export the entire table. - **Export to ZIP** - Export selected records to ZIP. Used to bulk export PDFs. - **Print selected items** - Generate default PDF prints for selected records. - **Delete selected** - Delete selected records from the table.**Actions,** such as **"Add new"** and **"Delete selected"** are **locked with permissions.**
### RecordsTable records are the main part of this view, it's where all the data is displayed.
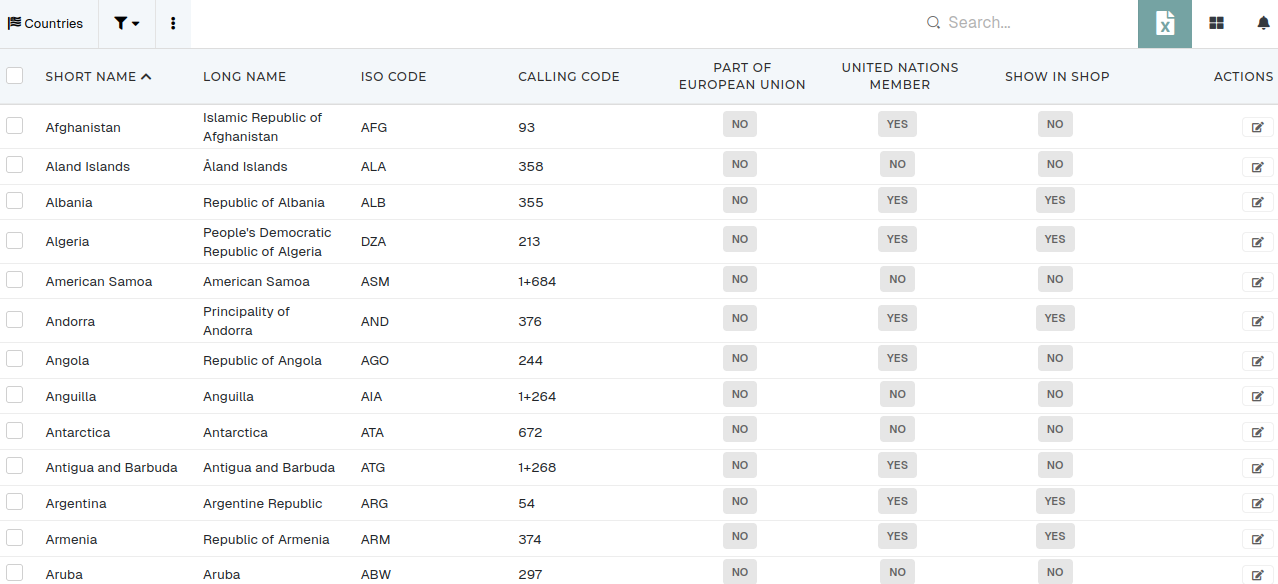 The table consists of selected visible table columns. Most tables have an **'Actions'** columns, where users can open and/or delete records. Some tables (*eg*. *contacts*) also have **"details rows".** These can be opened by clicking the "**+**" before the checkbox.
### Batch editing By checking a row, you can select one or more records. You can edit multiple selected rows at once by clicking the "edit" icon next to the column's name.Batch **editing is not advisable,** as updating multiple records at once could lead to complications.
Each **table can be sorted by** any of its **columns,** but only by a **one** **at** **a** **time**.
To apply sorting, simply click on the column name and the arrow that appears next to it will indicate, if you are sorting in an ascending or a descending order. To switch between these two, just click on the column name again.  To reset sorting for the current table and reapply default filters, click the **"Reset filters and sort"** button. To reset visible columns of table back to the default configuration, click the **"Reset visible columns"** button.  ### Table pagination The table pagination can be edited through the toolbar under the table. You can move by a single page at a time or jump to last/first page.  You can set count of records, shown per page (5, 10, 25, 50, 100). A count of all records in the table (*Showing **1 to 10** of 252 entries*) is shown on the left. # Filters The filters section, above a table, allows user's to apply custom filtering to the table. 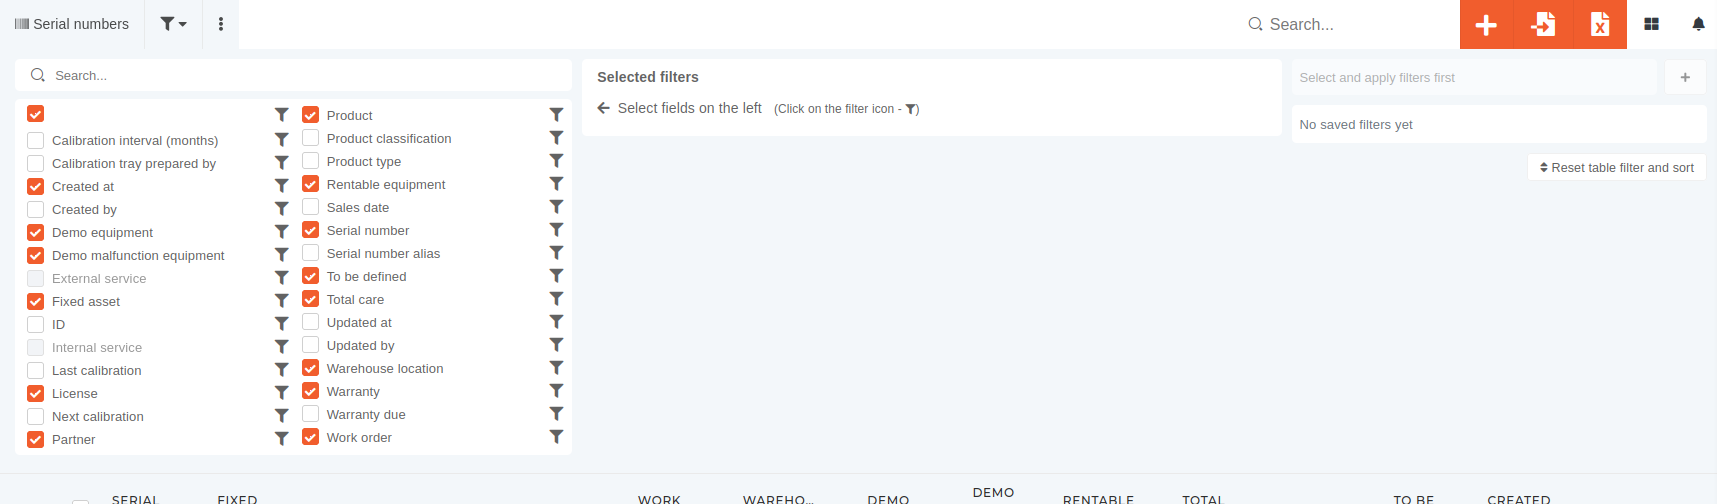 Filters for every field can be accessed by pressing the  icon next to the field's name.Fields without the filter icon cannot be filtered by.
#### Types of available filters There are several types of filters available in the filter section. Most common among these are:| **Yes/No filter** | Filter's value is either true or false. |
| **Date** **filter** | Field's value is a date range between date 1 and date 2. |
| **Text filter** | Field value is equal to given value. |
| **Select filter** | Select a value from a provided list. |
**NOTE:** The table filters, that you set for yourself, will only be set on the computer you set them on, if you don't save it.
#### Saving set filters When you create a customized table view, you can choose to save your current **configuration** (the filters you have set and the columns you have set as visible). 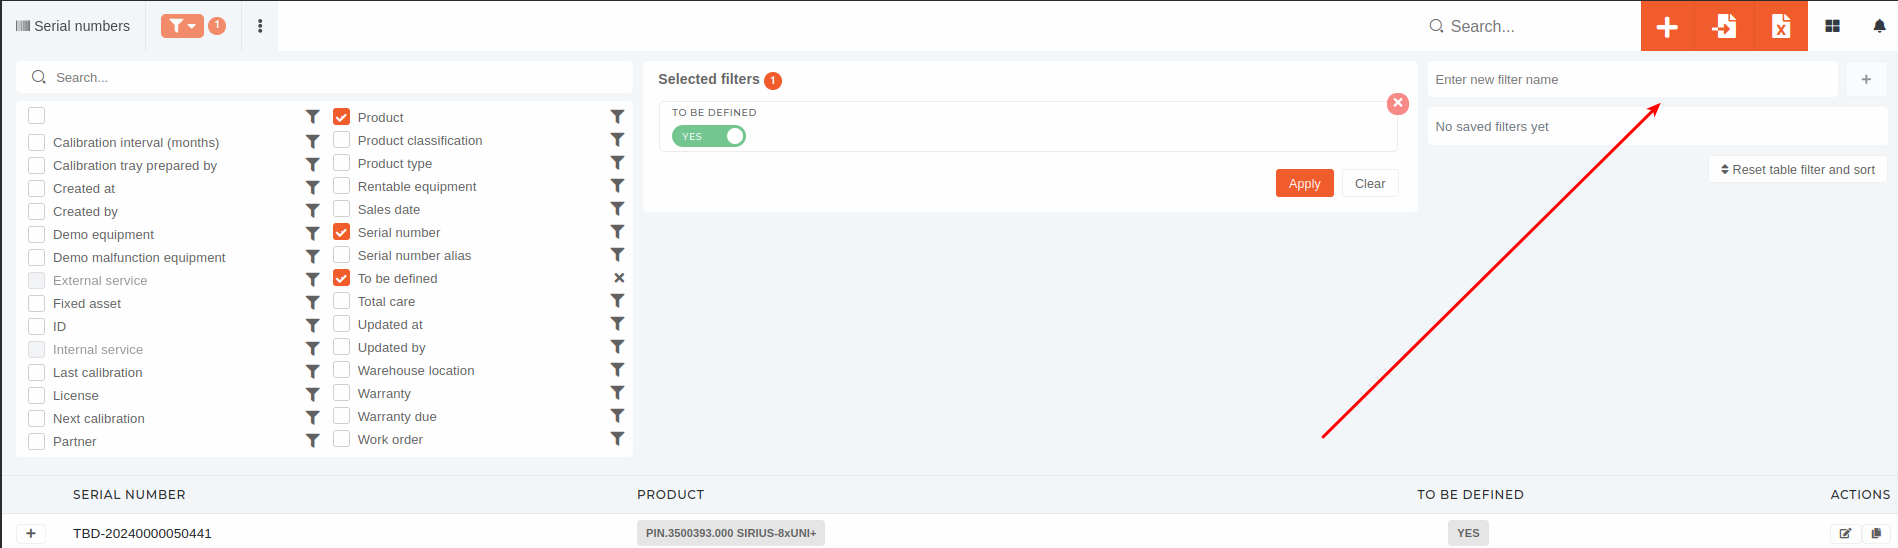 To save an existing configuration, just give it a name and press the "**+"** button, and the configuration will be saved, available for use anywhere you log in. To apply an existing saved filter, just click on it's name.**TIP**: If a saved filter is currently applied, that saved filter will show a check mark and will be colored green.
#### Setting saved filter as default You can set any saved filter as default, by clicking it's **"star"** icon. When a filter is set as default, it is instantly applied, when you visit it's table page. To unset a default filter, click it's **"star"** icon again. 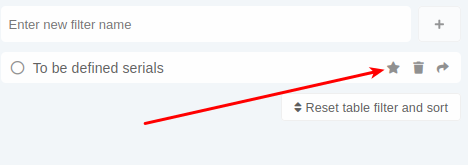There can be only one default filter set at a time. The current default filter has a colored star instead of a grey one.
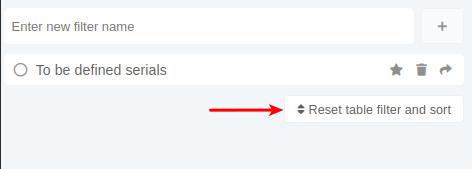
#### Editing saved filters You can only edit a saved filter's name. This can be done by clicking the "pen" icon that appears next to saved filter's name.  #### Sharing saved filters To share a saved filter, press the **"arrow right"** button. This displays a popup, where you select the user you want to share the saved filter with. You share the filter by pressing the **"share"** button. The shared filter will be visible after a page reload.  #### Removing saved filters Saved filters can be removed by clicking the **"trash"** icon. A confirmation dialog is displayed, and after confirming, the saved filter is deleted. There is a "**Reset table filters and sort"** button under the list of saved filter sets. By pressing this button, you remove all filters and any column sorting, done by clicking column headers in the tables.
 # ExportsMost tables in the ERP offer the option to export data to a formatted excel file.
This can be done by clicking the export **button with** the **Excel file icon.** During export generating, the button displays a loading animation. Once finished, the exported excel file is automatically downloaded onto your computer. The exported file is always named by the formula **exported-table-name\_today's-date-and-time\_random-number.xlsx** [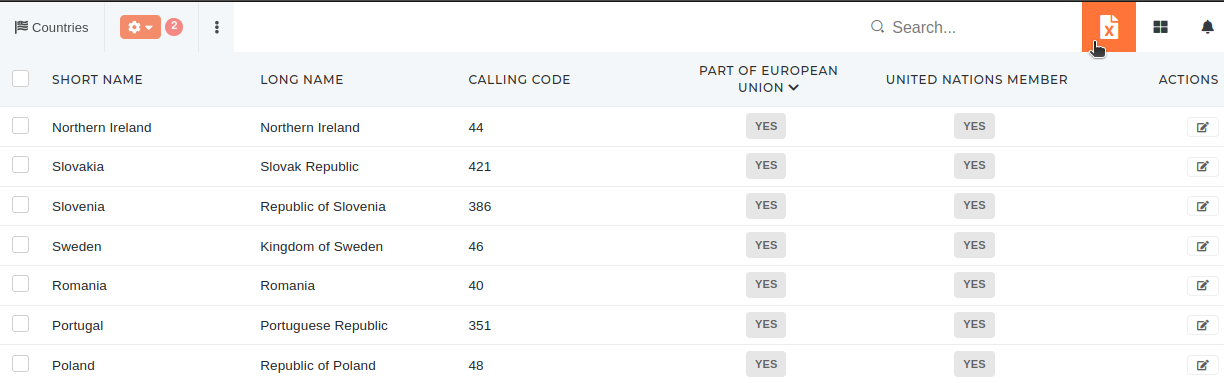](https://how-to-erp.dewesoft.com/uploads/images/gallery/2024-04/HORimage.png)**Export** is **affected** by **table filters** and **search.** If **no filters/search** are applied, **all rows** in the table will be **exported.**
**Example:** *Export of countries that are members of united nations and the european union.* 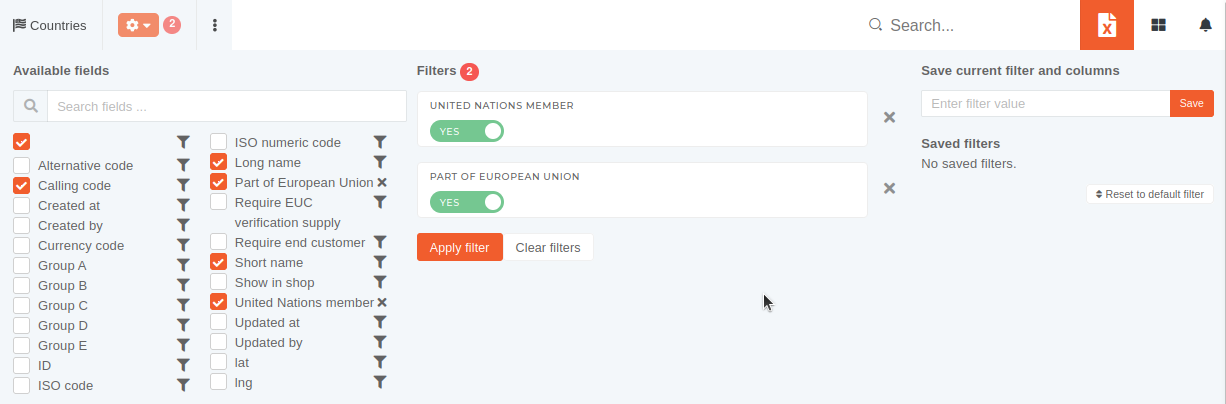 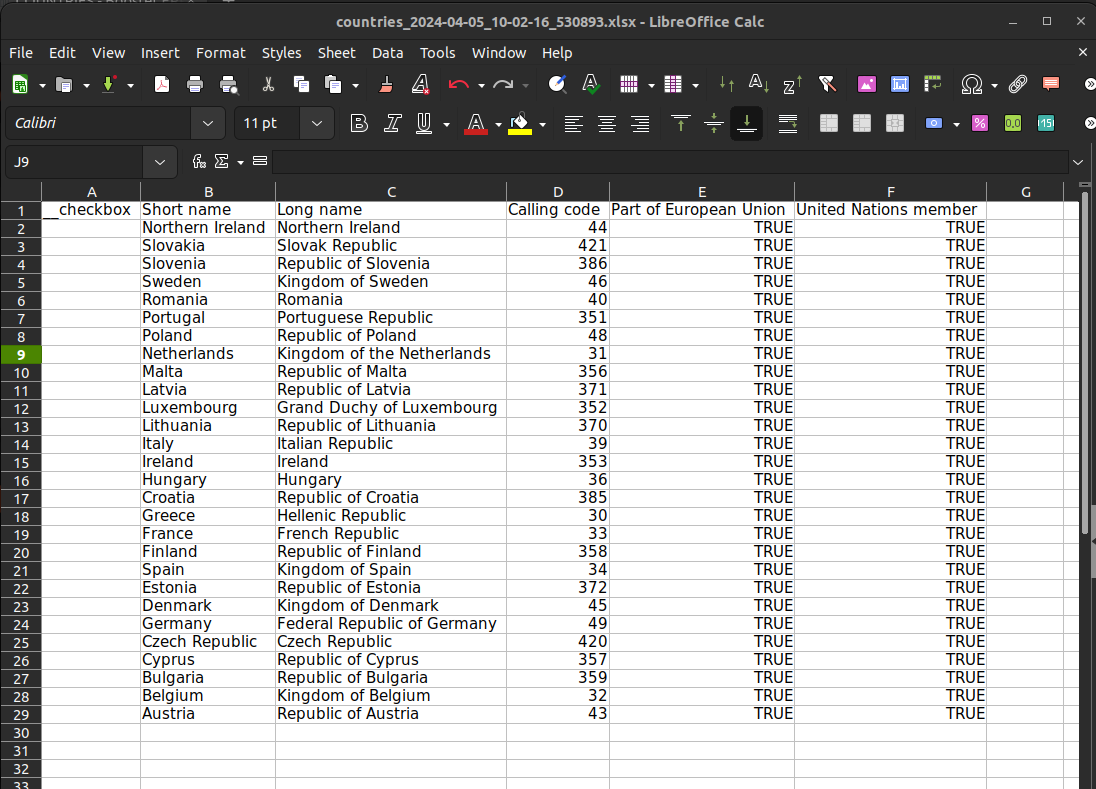 ##### Special purpose exports On certain tables, special, formatted exports are available alongside the default export. Here, a list of available exports is shown in a tooltip. These exports are present for a specific purpose and are usually unaffected by set filters or selected visible columns. [](https://how-to-erp.dewesoft.com/uploads/images/gallery/2024-04/BoRimage.png) # Imports Importing is currently only available on certain tables (eg. *Products* ). 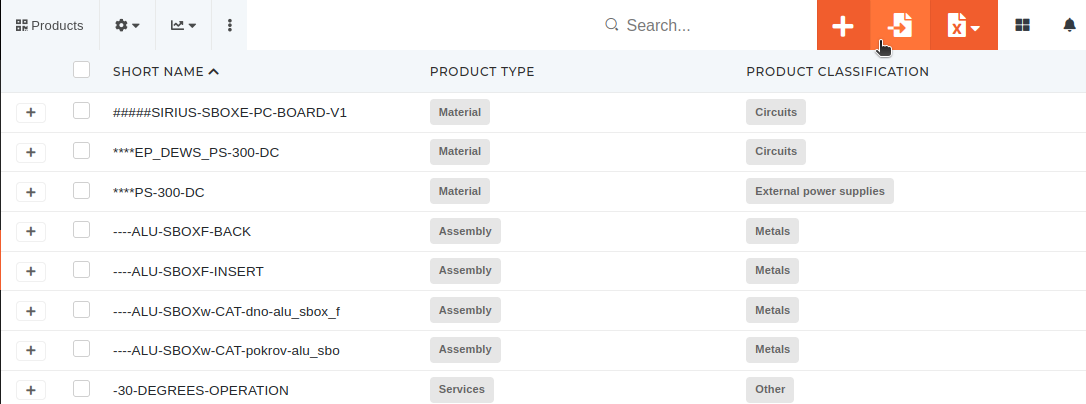 **1**. On pressing the **"Import"** button, a form is shown, in the "**Upload** **file**" step, that expects file, of type excel or csv, with the required data, sorted into columns. 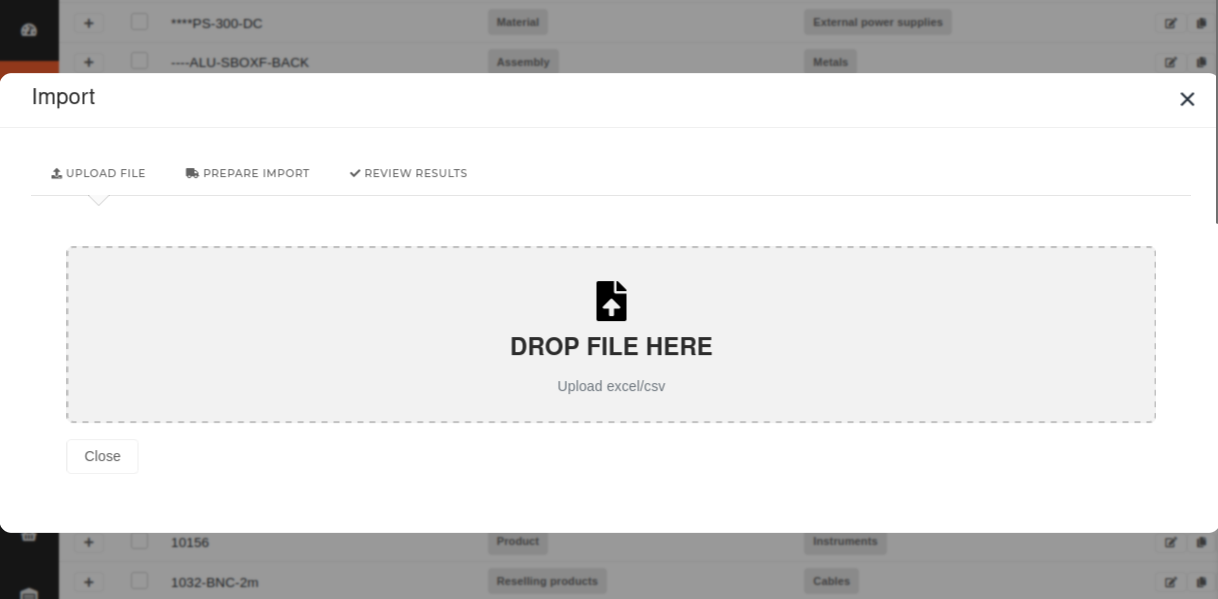 **2**. After uploading a suitable file, the form moves to the "**Prepare Import**" step and displays all rows from the file. 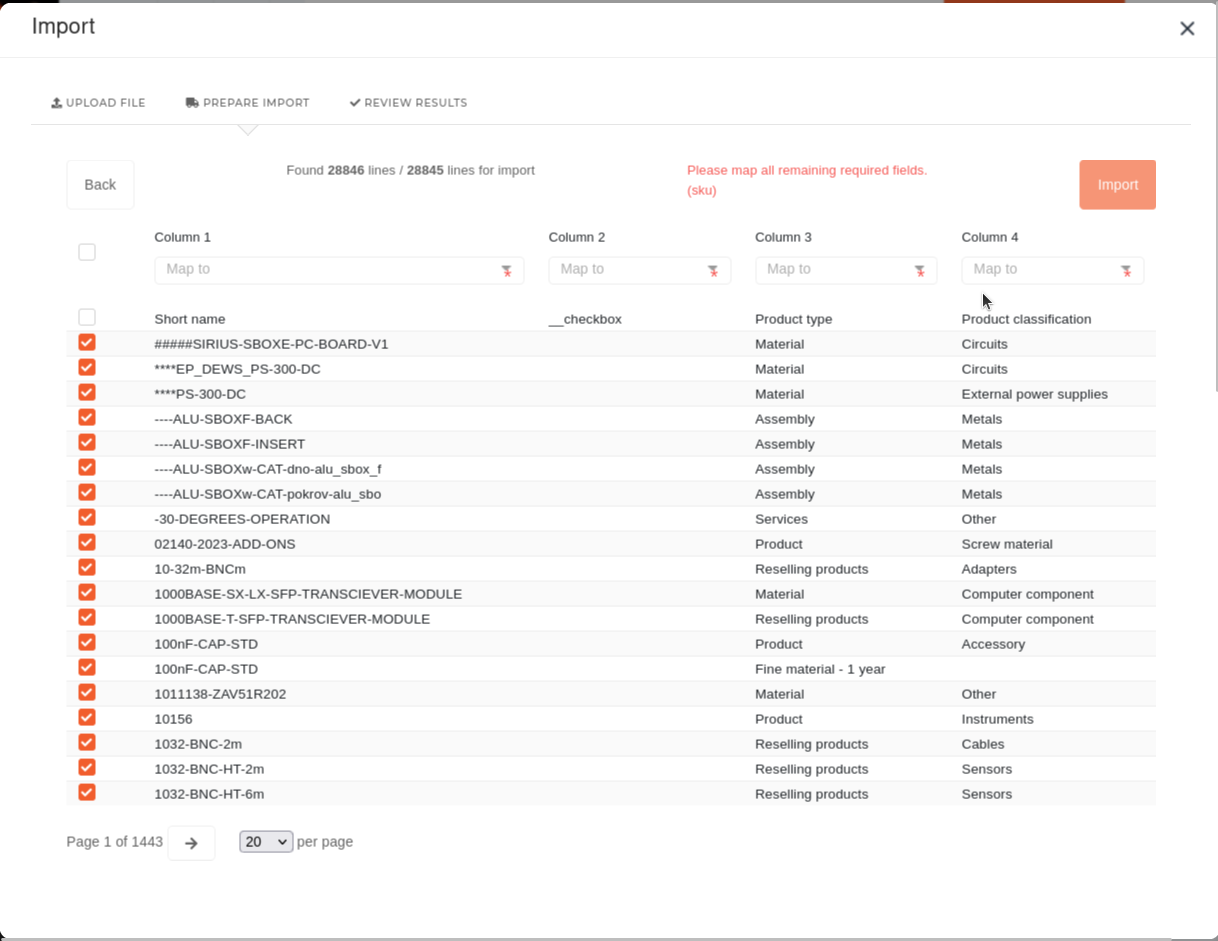 Here, we can map every column in the file to a column in the ERP table. All required columns are marked with a red asterisk (\*). The checkboxes on the left allow us to only select some rows or remove certain rows, that we do not want to import. **3**. Once you are done, click **"Import"** and the selected rows will be imported into the table. After successful import, you can review changes and close the form. #### Product import: Required fields: product\_type\_id short\_name name sku (if empty, SKU generator will fill up the data) weight (must be present, can be 0) example: https://docs.google.com/spreadsheets/d/1DhJW2IgTCOQIxHO15t\_zv0e6YHdAMoJ0e7mdVeIj1Pw/edit?gid=0#gid=0 # Notes Notes are used for communication between people in different departments and for communication between customers and production management. Users can add notes on entries in ERP by adding comments in the "Comments" section on update pages. To add a new comment/note, type it into the text field and press enter to post it. You can preview your note before posting it, and if you need help with how to format your note, you can press the help link, which will redirect you to the [Marked.org help page](https://marked.js.org/demo/?text=Marked%20-%20Markdown%20Parser%0A%3D%3D%3D%3D%3D%3D%3D%3D%3D%3D%3D%3D%3D%3D%3D%3D%3D%3D%3D%3D%3D%3D%3D%3D%0A%0AHow%20To%20Use%20The%20Demo%0A-------------------%0A%0A%23%20Header%0A%23%23%20Header%202%0A%23%23%23%20Header%203%0A%0ABold%20text%3A%20**bold**%0A%0A1.%20list%0A2.%20list%0A%0A-%20list%0A-%20list%0A%0A%23%20Links%0A%5Blink%20name%5D(https%3A%2F%2Fgoogle.com)%0A%0Aor%20just%20paste%20link%3A%20https%3A%2F%2Fgoogle.com%0A%0AText%0A%3E%20Odstavek%20Odstavek%20Odstavek%20Odstavek%20Odstavek%0A%0A%23%20Code%20block%0A%23%23%20Single%20line%0A%60int%20i%20%3D%200%3B%60%0A%0A%23%23%20Multi%20line%0A%60%60%60%0Aint%20i%20%3D%200%3B%0Ai%2B%2B%3B%0Aecho%20i%3B%0A%60%60%60&options=%7B%0A%20%22baseUrl%22%3A%20null%2C%0A%20%22breaks%22%3A%20false%2C%0A%20%22extensions%22%3A%20null%2C%0A%20%22gfm%22%3A%20true%2C%0A%20%22headerIds%22%3A%20true%2C%0A%20%22headerPrefix%22%3A%20%22%22%2C%0A%20%22highlight%22%3A%20null%2C%0A%20%22langPrefix%22%3A%20%22language-%22%2C%0A%20%22mangle%22%3A%20true%2C%0A%20%22pedantic%22%3A%20false%2C%0A%20%22sanitize%22%3A%20false%2C%0A%20%22sanitizer%22%3A%20null%2C%0A%20%22silent%22%3A%20false%2C%0A%20%22smartLists%22%3A%20false%2C%0A%20%22smartypants%22%3A%20false%2C%0A%20%22tokenizer%22%3A%20null%2C%0A%20%22walkTokens%22%3A%20null%2C%0A%20%22xhtml%22%3A%20false%0A%7D&version=master), where you can see examples of how to formulate text inside your note with markup. Notes, added in the ERP, are by default set to private, unless otherwise specified: - When the only section is **Comments,** you can only add comments with private visibility (only visible within the ERP) .  - When the section is split into **Public comments** and **Private comments**, you can add private and public comments.  Once posted, the public note is visible and everyone can add a reply. The note's author has additional options, such as editing its content and deleting the note.  He can also press the **create ticket** link to create a new ticket within our support's Freshdesk application. Once a ticket is created, the **create ticket** link is replaced by the link to the created ticket (eg: *Ticket #42*). # Can't login #### **Having trouble logging in?** Below are listed a few troubleshooting steps that you can do on your own. ##### **1. Check your password and email spelling** Sometimes we type and without knowing press the wrong key. Make sure that you the credentials you have inputted, are spelled correctly.Make sure that your Caps Lock is not turned on, as the site's passwords are case-sensitive.
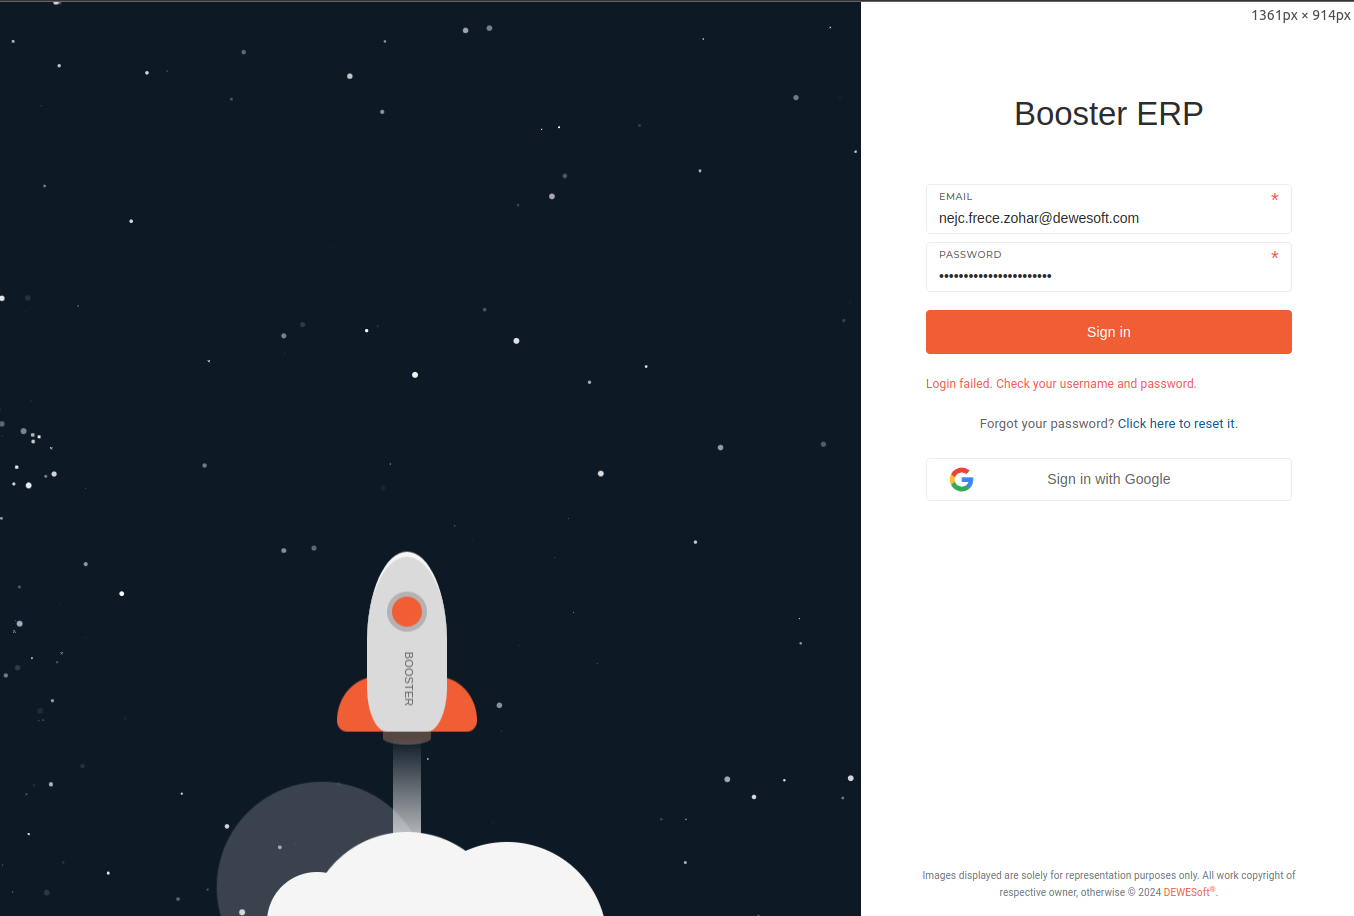 ##### **2. Reset your password** Issues with login could be caused by a password problem. You can reset your password on your own by clicking the link under the login form and inputting your email. Further instructions will be sent to the email address, you inputted.If an ERP account with the email address you provided exists, you will receive a password reset instructions email. If the email does not appear in your **Inbox**, please check your **Spam** folder as well.
Keep in mind that your **ERP credentials are separate from your Google email credentials** .
##### **2. Try logging in with google** If logging in with your email and (new) password doesn't work, you can try to log in with your google account, by clicking the **"Sign in with Google"** button under the login form. Make sure you are logged in with your google account. If an account with your google email address exists, you will get logged in.
##### **3. Contact the ERP development team** If all else fails, contact the Web team via emailThe ERP system is continuously being improved, with new features and reported bug fixes being implemented.
When an new version of the ERP is ready, the development team releases it to "production", updating the live version of the page. When this happens, a pop-up id displayed in the middle of any open ERP page. [](https://how-to-erp.dewesoft.com/uploads/images/gallery/2026-03/lMpimage.png) When the **"new release"** pop-up appears, two options are available: - **Refresh now** - This option refreshes your current page. - **Continue and refresh later** - This option closed the form, allowing you to finish your work and refresh the page, when you are ready.After a new version release, every tab has to be refreshed separately. This is designed for cases when multiple important forms are being edited at once.
# Multiple people editing a form It often happens that multiple people are editing a single form at once.You can see who is editing the form in the "presence channel", next to the record's document number.
[](https://how-to-erp.dewesoft.com/uploads/images/gallery/2025-05/BnQimage.png) When one editor saves the form, it is automatically disabled for everyone else and a message is displayed, that the form was saved by someone else. If possible, the page with the form should be refreshed, since it will remain disabled until it is refreshed. [](https://how-to-erp.dewesoft.com/uploads/images/gallery/2025-05/ag6output.gif) # Kako oddati zahtevek ### 1. Najprej izberi tip Zgoraj izberi eno od možnosti: - **Change Request** – želiš spremembo ali novo funkcijo. - **Help** – potrebuješ pomoč ali pojasnilo. - **Bug** – nekaj ne deluje pravilno.Polja se prilagodijo izbranemu tipu zahtevka.
### Če izbereš Bug 1. **Priority** - **Critical** **(system down)** – nič ne deluje, delo stoji. - **High** – pomembno, močno ovira delo. - **Normal** – neprijetnost, ki ne ovira dela. 2. **Message\*** (obvezno) **Napiši:** • Kaj si želel narediti. • Kaj si kliknil (zaporedje korakov). • Kaj se je zgodilo (napaka, nepričakovano vedenje). • Priloži screenshot ali video (če lahko zaslon posnameš s telefonom, je čisto OK). **Primer:** ``` Želel sem izvoziti račun v PDF. Koraki: Finance > Računi > Izvoz > PDF. Pri kliku na “PDF” se prikaže rdeče obvestilo “500 error”. Priponka: slika zaslona. ``` ### Če izbereš Help 1. **Message\*** (obvezno) **Napiši:** • Kje si v programu (modul/meni). • Kaj želiš doseči. • Kje si obtičal ali kaj ti ni jasno. • Če imaš primer (sliko/Excel), ga omenih. **Primer:** ``` Sem v Prodaja > Ponudbe. Želim dodati nov popust po kupcu, a ne najdem nastavitve. Ali to podpira sistem in kje to vklopim? ``` ### Če izbereš Change Request Izpolni vsa štiri obvezna polja (označena z \*). Kratki jasni stavki. Če se ti mudi, napiši po alinejah. **A) Content Specification of the Request\*** • Napiši, kaj želiš spremeniti/dodati. • Dodaj screenshot ali povezavo do primerov (če imaš). • Če imaš preprost skiciran predlog (tudi slika s telefonom), je super. **Primer:** ``` Želim dodati stolpec “Marža %” v seznamu artiklov (Prodaja > Artikli). Stolpec naj se vidi v tabeli in izvozih. Prilagam sliko, kje naj bo. ``` B) **Current State\*** • Opiši, kako je zdaj: kateri meni, kateri koraki, kaj uporabniki vidijo. • Zapiši glavne težave (npr. podatka ni, predolgo traja, veliko klikov). **Primer:** ``` Zdaj v seznamu artiklov vidimo samo nabavno in prodajno ceno. Za izračun marže moramo odpirati vsak artikel posebej ali izvažati v Excel. ``` **C) Purpose and Objectives\*** • Napiši, zakaj to potrebujete?. • Kaj se bo izboljšalo (čas, manj napak, boljša preglednost)? **Primer:** ``` Namen: hitrejši pregled marž brez izvoza. Cilj: 30% manj ročnega dela pri tedenskih pregledih cen. ``` **D) Acceptance Criteria (AC)\*** • Napiši, kako bomo preverili, da je stvar narejena pravilno. • Uporabi preprost vzorec Given / When / Then (ni treba biti popoln). **Primer:** ``` Given: Sem v Prodaja > Artikli When: Odpre se tabela z artikli Then: Vidim nov stolpec “Marža %” in pravilne vrednosti And: Stolpec je vključen v CSV in PDF izvoz ``` **E) Additional References (neobvezno)** • Povezave na datoteke, primere, dokumente, druge issue-je. **Primer:** ``` Primer poročila v Excelu: \\server\prodaja\marze\vzorec.xlsx ``` ### **Pošlji** Ko izpolniš obrazec, pritisni **Send**. Tvoja službena e-pošta bo dodana kot reply-to, da lahko odgovarjamo in dopyrašujemo, če kaj manjka. Hitri namigi za boljšo oddajo • Kratko in jasno: 3–6 stavkov zadošča, če so ključni podatki noter. • Slika pove več: prilepi posnetek zaslona ali fotografijo monitorja. • Koraki: pri bugih vedno napiši 2–4 korake, da napako ponovimo. • AC: 2–3 alineje so dovolj – služijo kot “checklist”, ali je stvar zaključena. # Get a daily e-mail report from any table filter Any saved table filter can be linked to the **“Send daily filtered email report”** scheduled job. Once linked, you receive a daily e-mail with the filter’s current matching rows attached as a spreadsheet — great for “send me everything that matches X every morning”.This guide covers **linking** only. If you don’t have a saved filter yet, first create and save one — see [Creating and saving table filters](https://how-to-erp.dewesoft.com/REPLACE-WITH-LINK-TO-FILTERS-PAGE). It works on any table you have access to (Products, Sales orders, Work orders…).
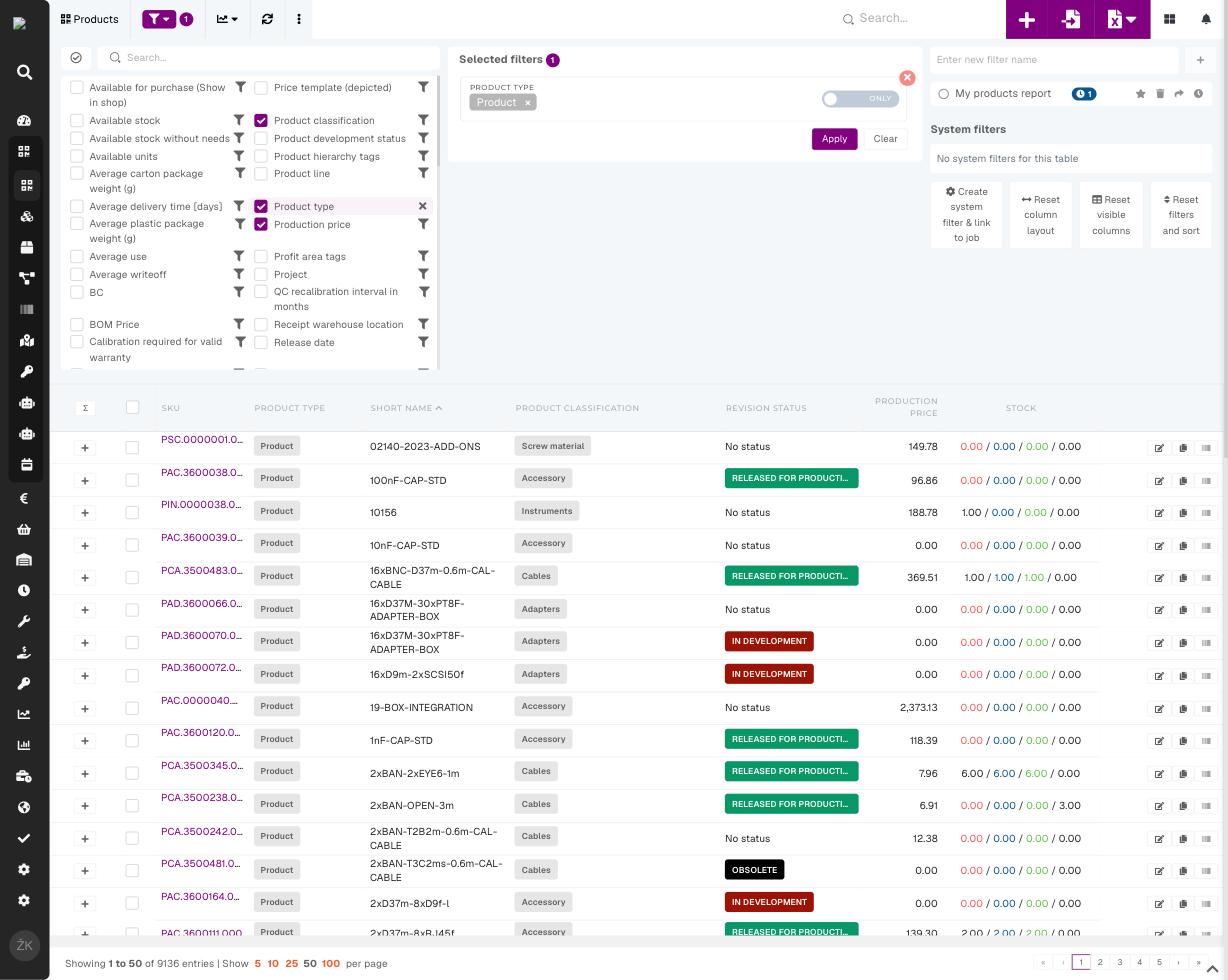
## 1. Open the filter panel and find your saved filter On the table, open the **filter panel** (funnel icon, top-left). Your saved filters are listed on the right, each with a row of icons. On the filter you want, click the **clock icon** — *“Link to scheduled job”*. 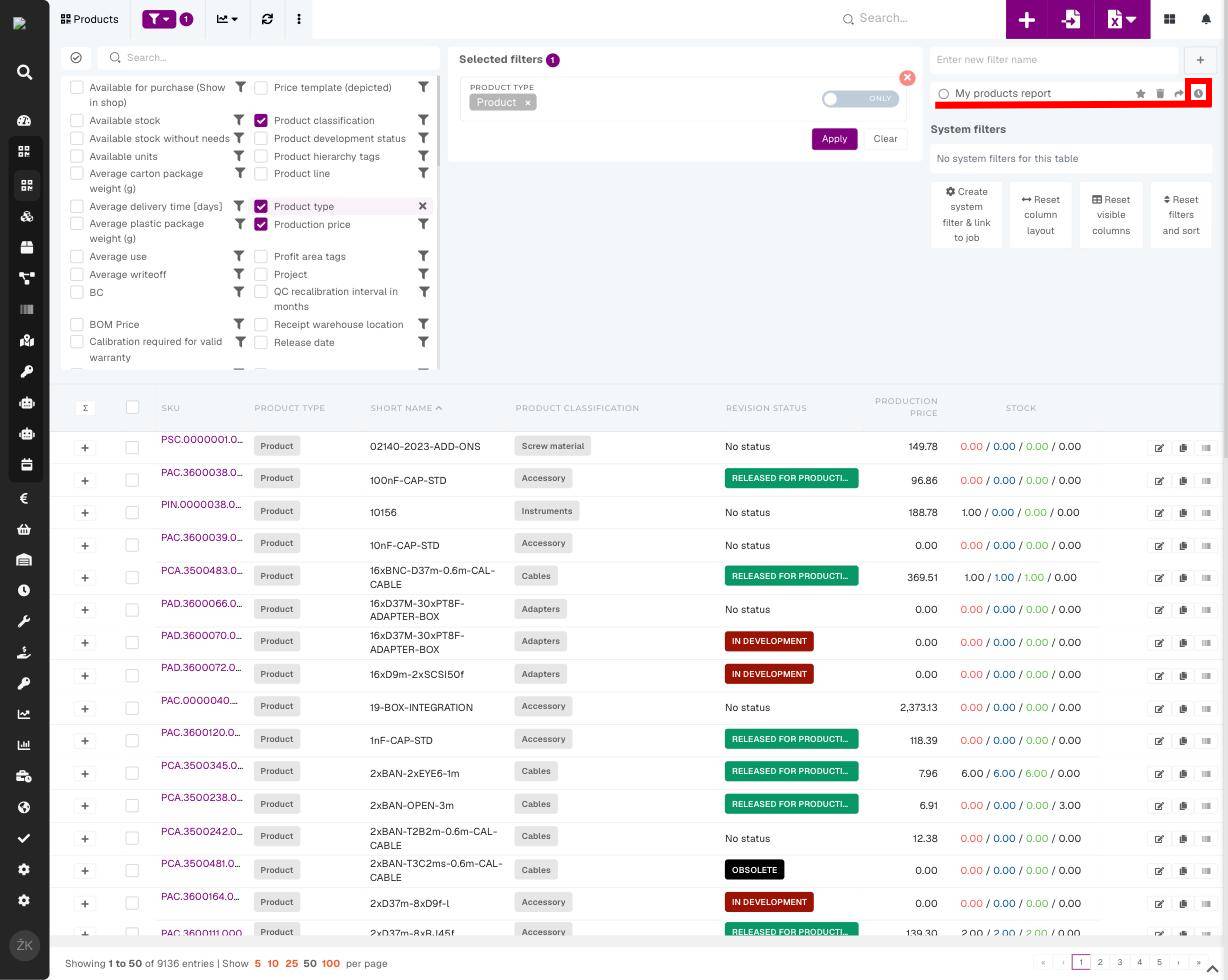 ## 2. Link it to the daily e-mail report 1. In the **Select scheduled job** dropdown, choose **“Send daily filtered email report”**. 2. Click **Link filter**. [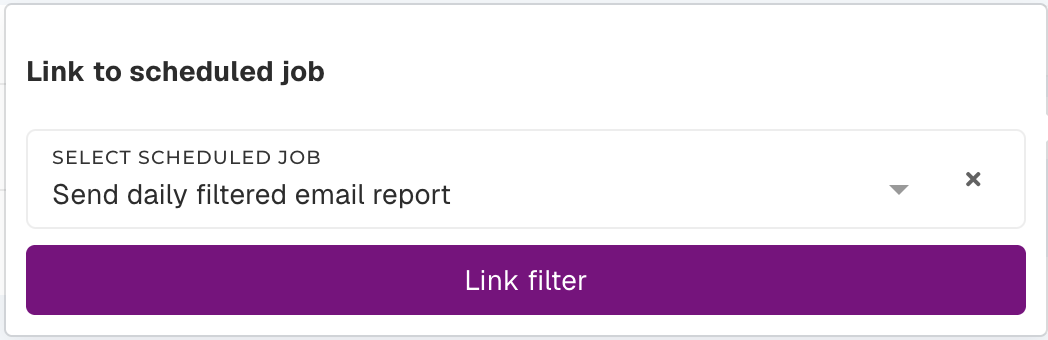](https://how-to-erp.dewesoft.com/uploads/images/gallery/2026-07/nqJimage.png)Done! A small badge on the filter shows it’s linked. From the next scheduled run you’ll receive a daily e-mail with the matching rows as a spreadsheet, sent to your own address.
## [](https://how-to-erp.dewesoft.com/uploads/images/gallery/2026-07/image-1784015706314.jpg) 3. Stop or manage a report Click the same **clock icon** again. Jobs the filter is linked to are listed under *“Already linked to”* — click **X** next to a job to stop that report. You can re-link it any time. [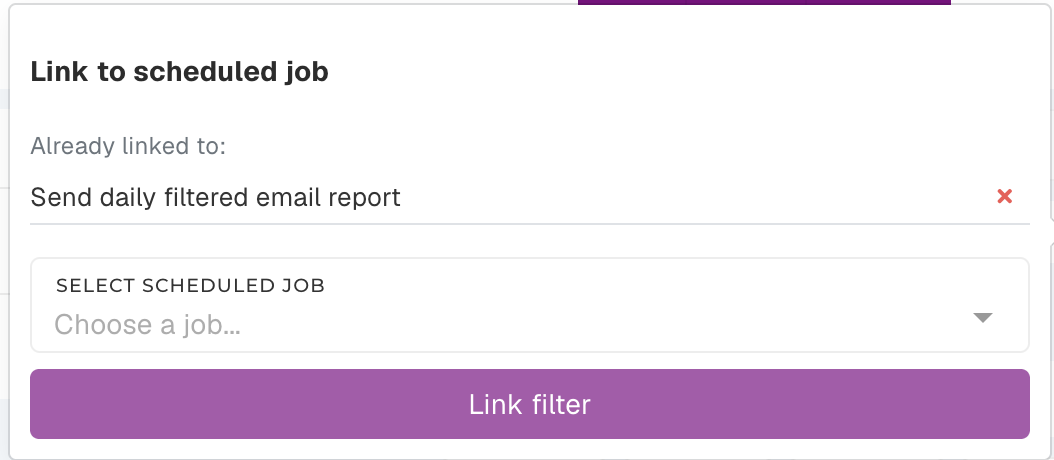](https://how-to-erp.dewesoft.com/uploads/images/gallery/2026-07/y9Jimage.png)**Good to know**
- The e-mail always reflects the filter’s **current** criteria and visible columns — edit the filter and the next report updates automatically. - The report is sent to **you**, and only includes rows you have permission to see. - Need a different frequency or recipient? Those are managed by an administrator.