If invoice has already been issued and sent to customer, you need to issue a new credit note. You should not modify already sent invoices!
1. Open the problematic **issued** **invoice** and remove all of its **items**. 2. Update the **shipping** and **financing** costs to **zero**. 3. Change status of the **issued invoice** to **canceled**. 4. Change invoice's **delivery note** status to **canceled.** 5. Delete **shipping list**: [](https://how-to-erp.dewesoft.com/uploads/images/gallery/2024-03/ixRimage.png) 6. Delete **packing list** (flow is the same as for deleting shipping list) 7. Go to the **Packing work order** and open it's **material flow.** 8. Find all of the write-off documents: [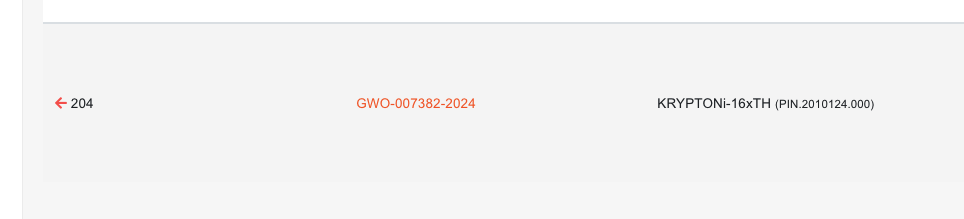](https://how-to-erp.dewesoft.com/uploads/images/gallery/2024-03/BAuimage.png) 9. Open each write-off and cancel it (this will remove write-off transactions from database): [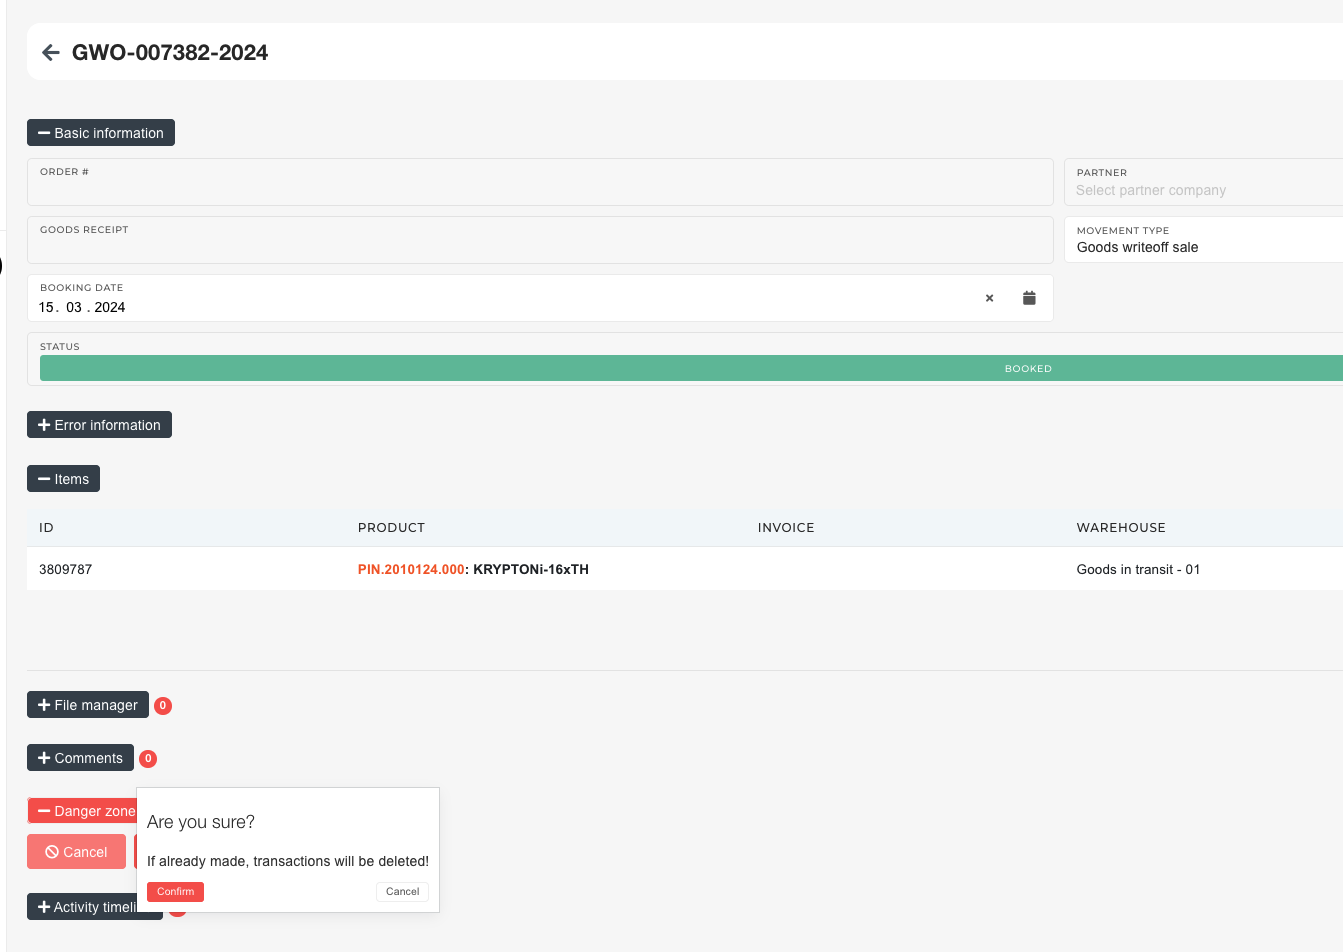](https://how-to-erp.dewesoft.com/uploads/images/gallery/2024-03/8P3image.png) 10. Material is now back on packing work order. Do with it what is necessary. # Create an issued invoice for merch orderThis action requires the "**Update order sale items**" permission.
Prices on sales orders can be updated directly on items. If price lists are set up, prices can be automatically added from there.Prices can be **only** **set** **on** **child** item. Price is then propagated to parent items.
You can **set item price to 0.** This should only be done for **included** **items**. These **will** then **be** **marked** **as** **"bundled"**.
*There is also additional button if you have price lists setup* To change the price of a sale order item, go to **"Order items"** section and press the **"+"** button on the item you want to change. Click the "**+**" to open a section under the item, that lists all parts of the order item (sub-items, associated serials, licenses...).  Here, changing the price of the item will update the actual price of the item, and of the order as a whole.  # Replace product on Merch order Step by step guide to change product on "merch" order:**Please note**: you will need **Order processing**, **Human Resources** and **Head of logistics** people to complete this process.
Go to the order's details page and change the **order's** status to **NEW.** 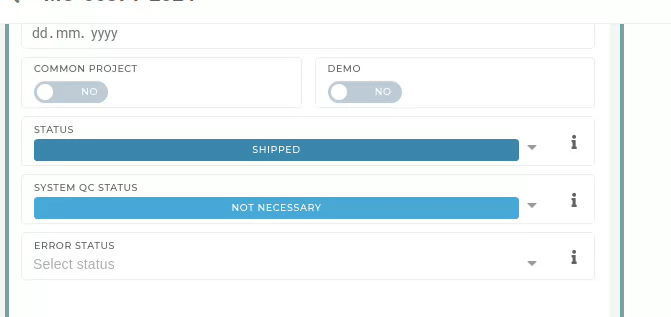 Go to the order's **packing work order** and change its status to **NEW** as well. **Move** the packing work order **item** **to** **another** **packing** work order. Leave everything empty. 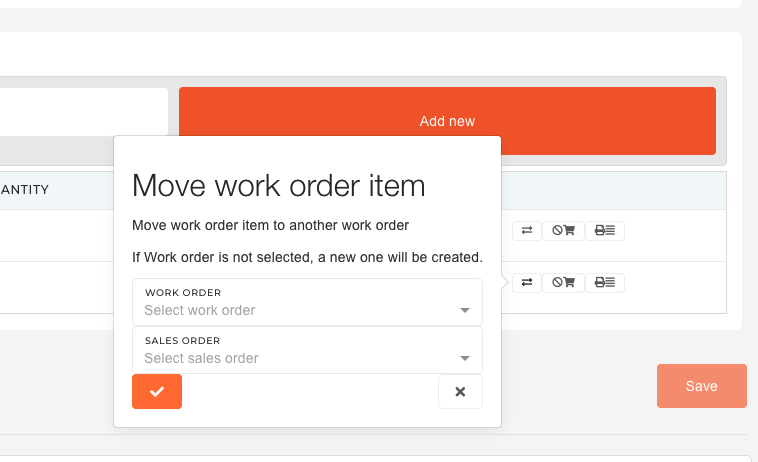 **Find** the **new packing work order** and go to its material flow. Find the **goods writeoff** and click on it. Scroll down and **cancel** **the goods** **writeoff**: 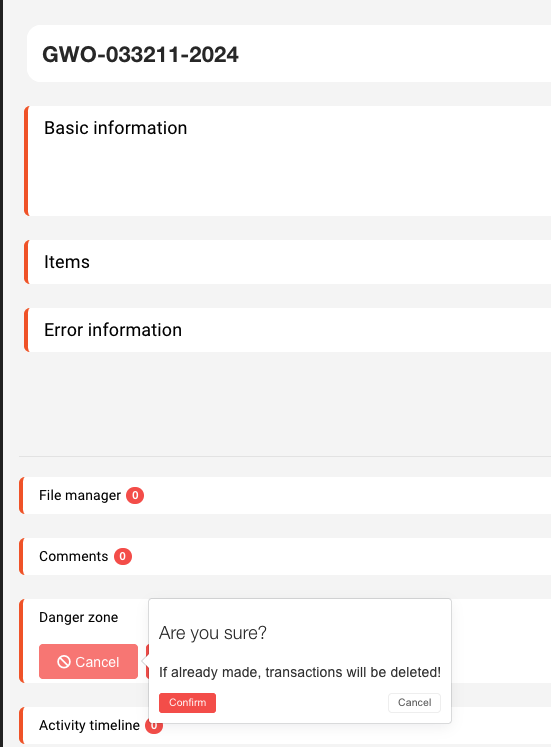Now the material can be unreserved from this packing work order.
After the material has been unreserved form the packing work order, the packing work order must be canceled. With the packing work order canceled, go to work order's issued invoice and delete correct item on it.  The correct item also has to be deleted on the merch order. 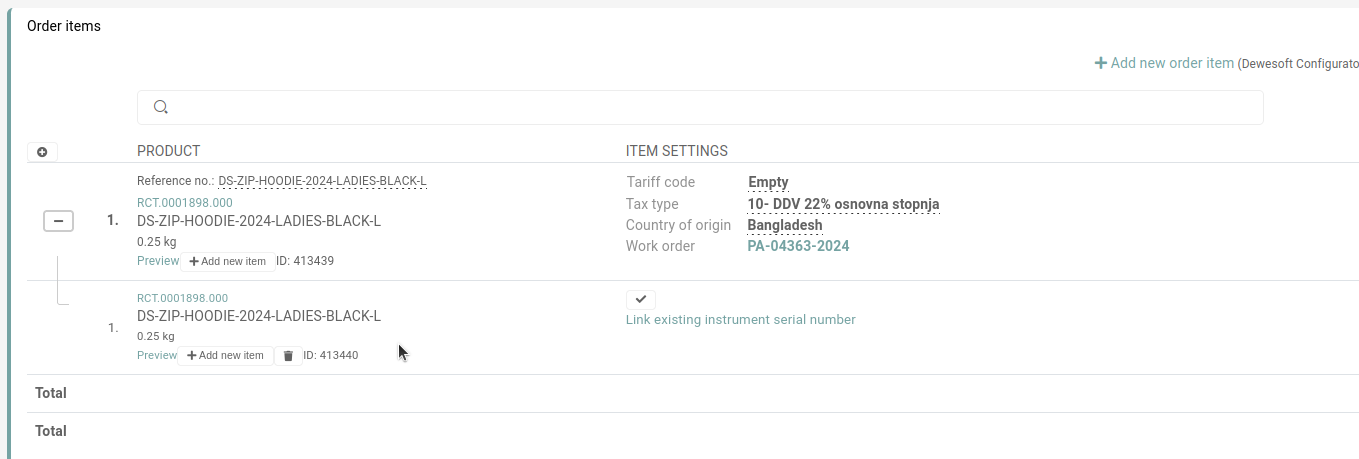 After that, add a new item to merch order. Go to **Order processing** and **add** the **new item** to **existing packing:** 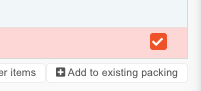 Then virtually and physically reserve item.The item has to be written off. This is currently handled by the Web department. Send an mail to **web@dewesoft.com**)
Change the status of order's **invoice** to **NEW** and update it: 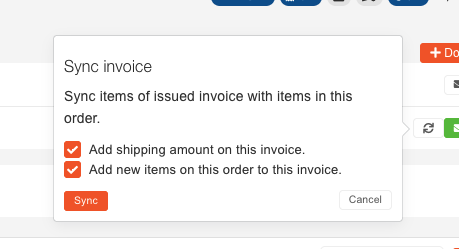 Then, **change** the **status** of the **packing** **work** **order** to **CLOSED**. Lastly, change the status of the merch order to **SHIPPED.****After the process** if finished, the **HR** department must **update** the **user's coupon value** to reflect the changes on order.
# Demo order management**Example:** DO-00027-2026
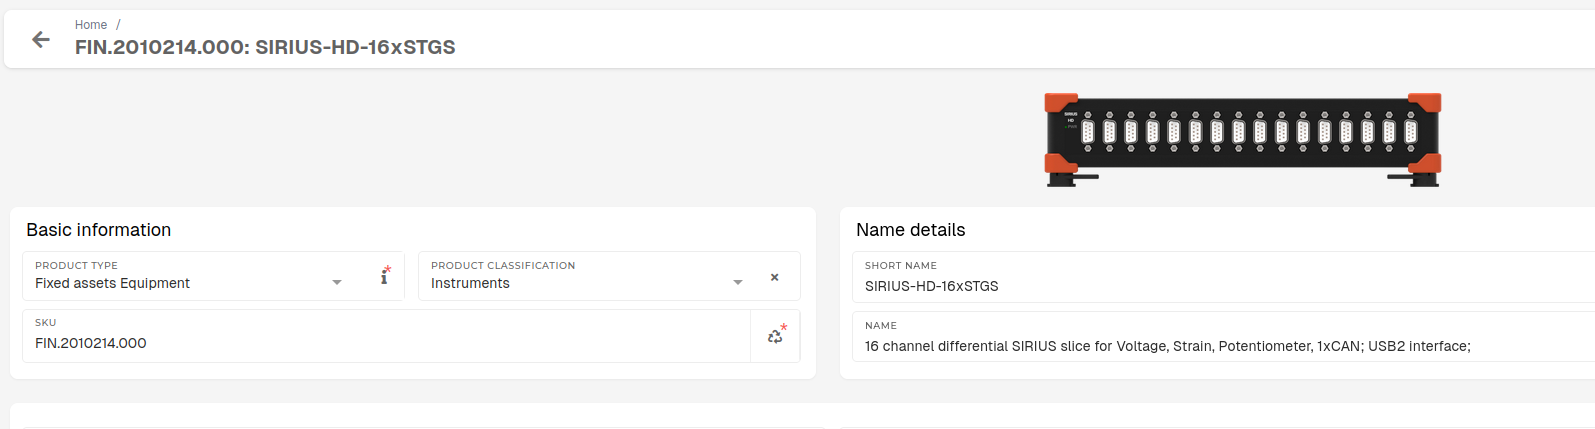
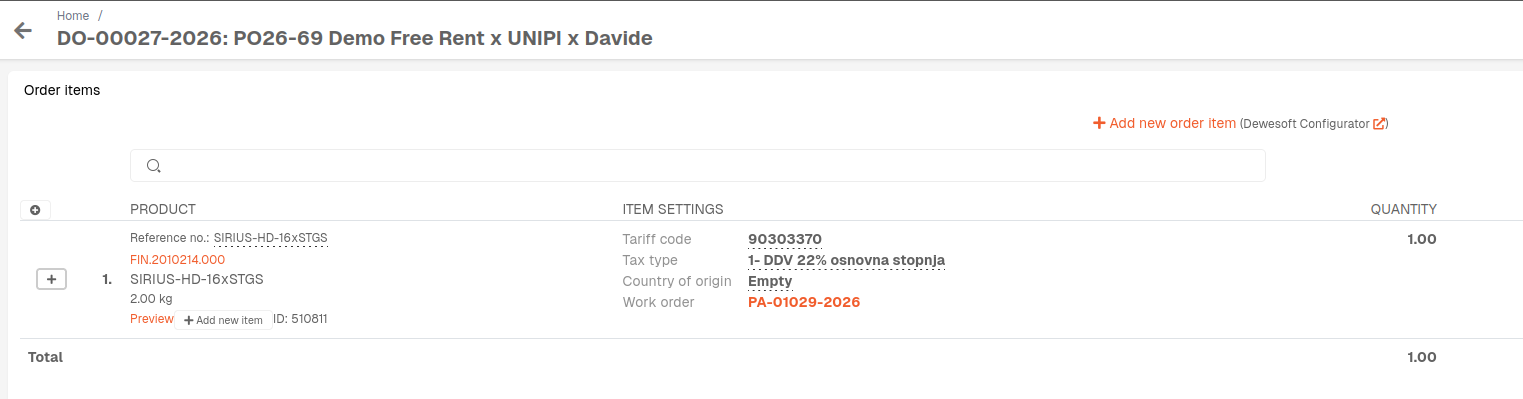 #### Summary - Create fixed asset equipment product(s) for every product on Demo order (if they don't exist yet). - Create a purchase order for the Demo order. - Receive all products from Demo order to stock as the fixed asset equipment products, created earlier. - Create a sale order of type Demo or Rental with all received products. - Create a packing work order for your new sale order, and create a shipping list. #### 1. Add fixed asset equipment product(s) If they don't exist already existing, create **product(s)** of type **fixed** **asset equipment** for the product(s) in the **Demo** **order**.Product type should be **"Fixed assets Equipment".**
 #### 2. Create a purchase order for the Demo order Once all fixed assets products are created, a purchase order must be created, in order to receive Demo products to stock.Products can be "received to stock" with rebooking of existing products to fixed asset equipment products, but creating a purchase order and receiving products with goods receipts is a safer way, stock-wise.
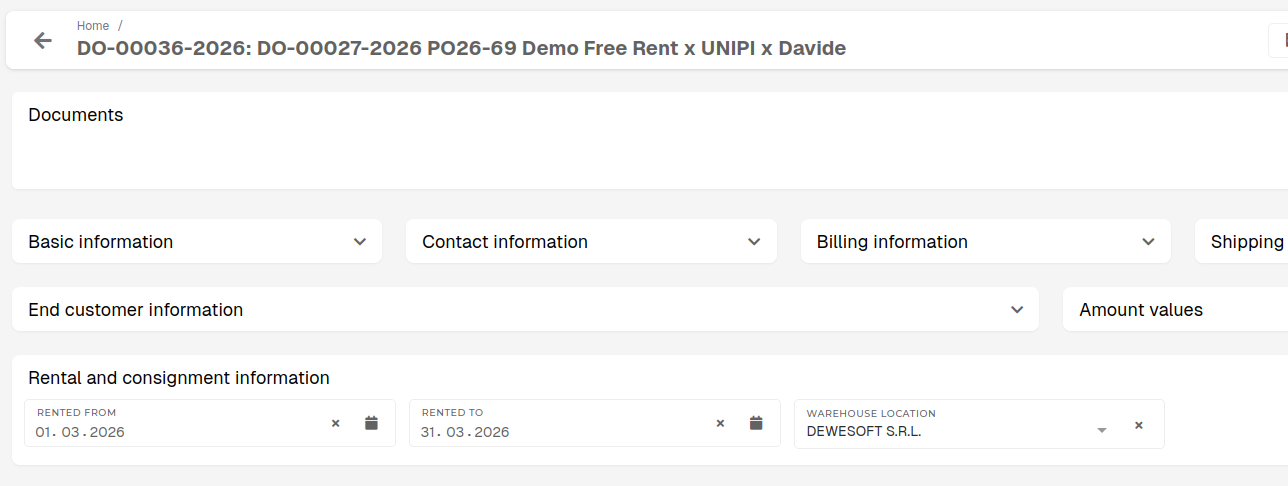
Create a new purchase order, input Demo order's document number as purchase order reference number and add fixed asset equipment products as order items. 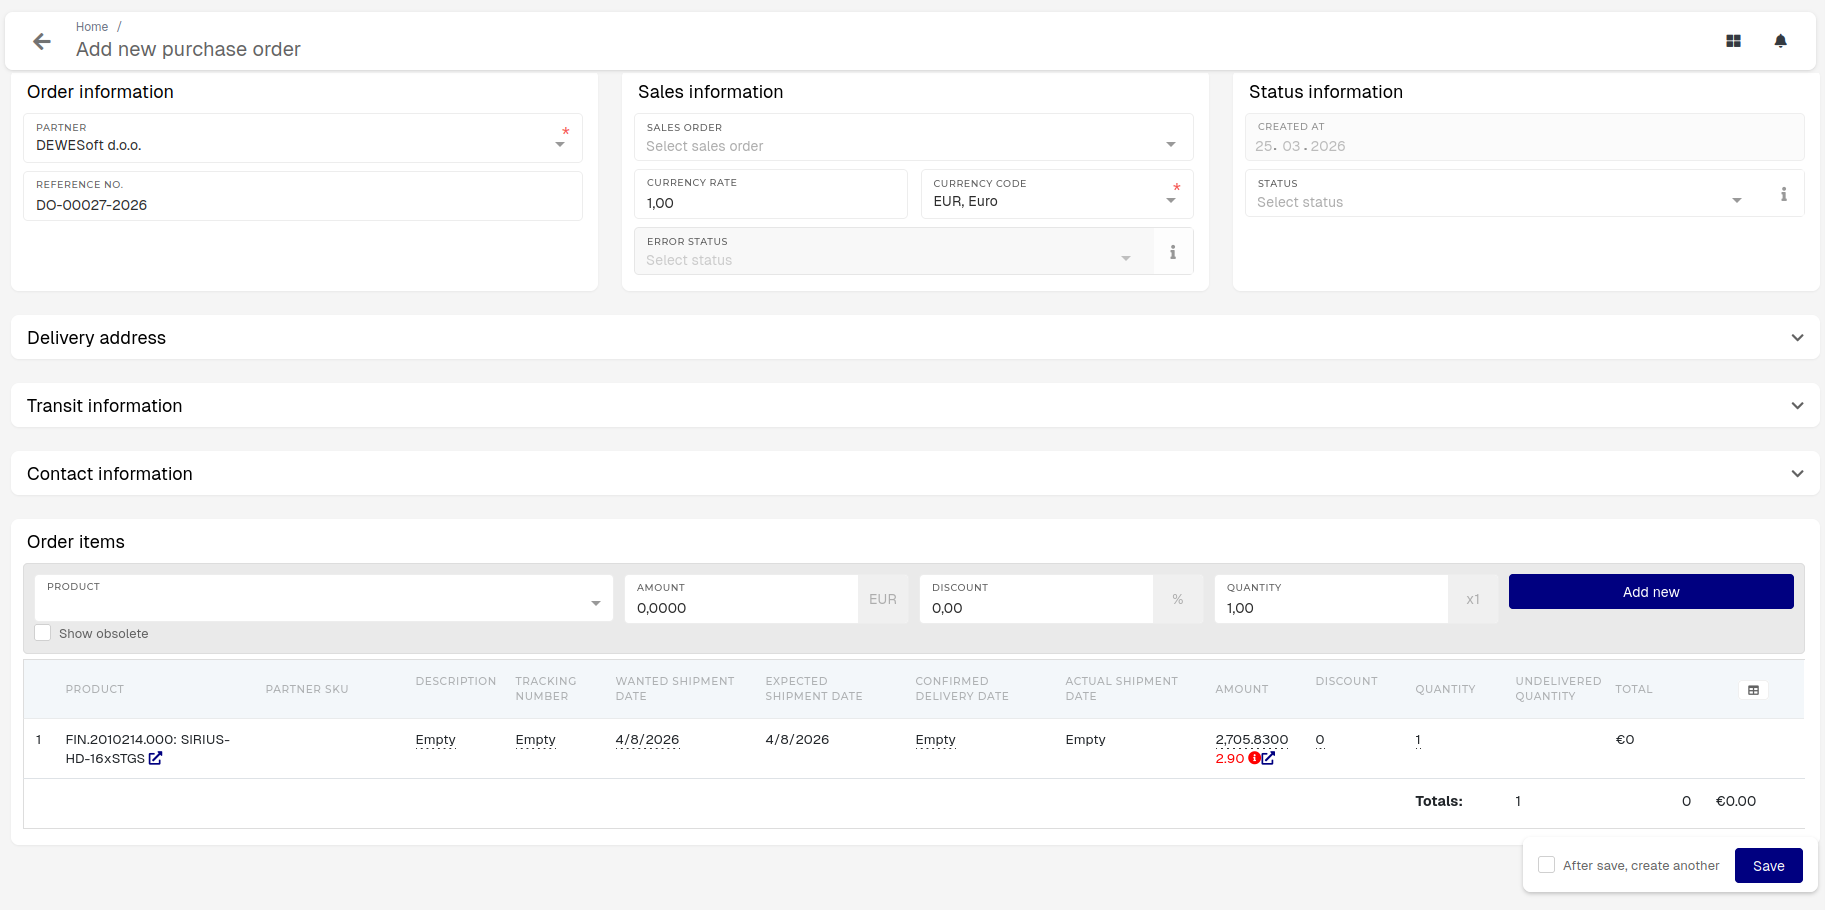 #### 3. Receive Demo order products to stock as fixed asset equipment products Create a goods receipt for all purchase order items (product from the Demo order). [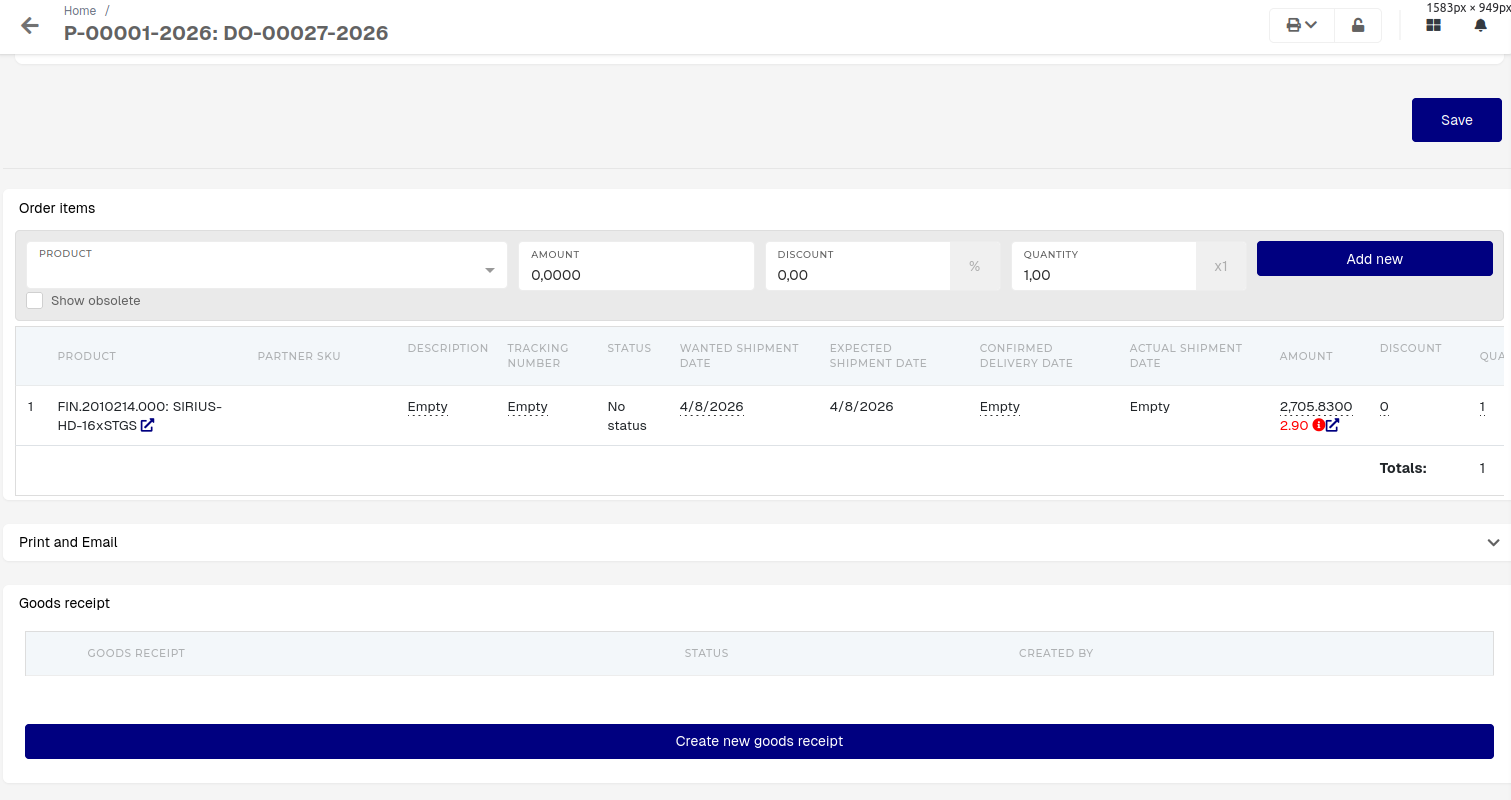](https://how-to-erp.dewesoft.com/uploads/images/gallery/2026-03/cz4image.png) Click **"Create new goods receipt",** fill out the **"New goods receipt for Order"** form for all purchase order items and book the receipt to stock. 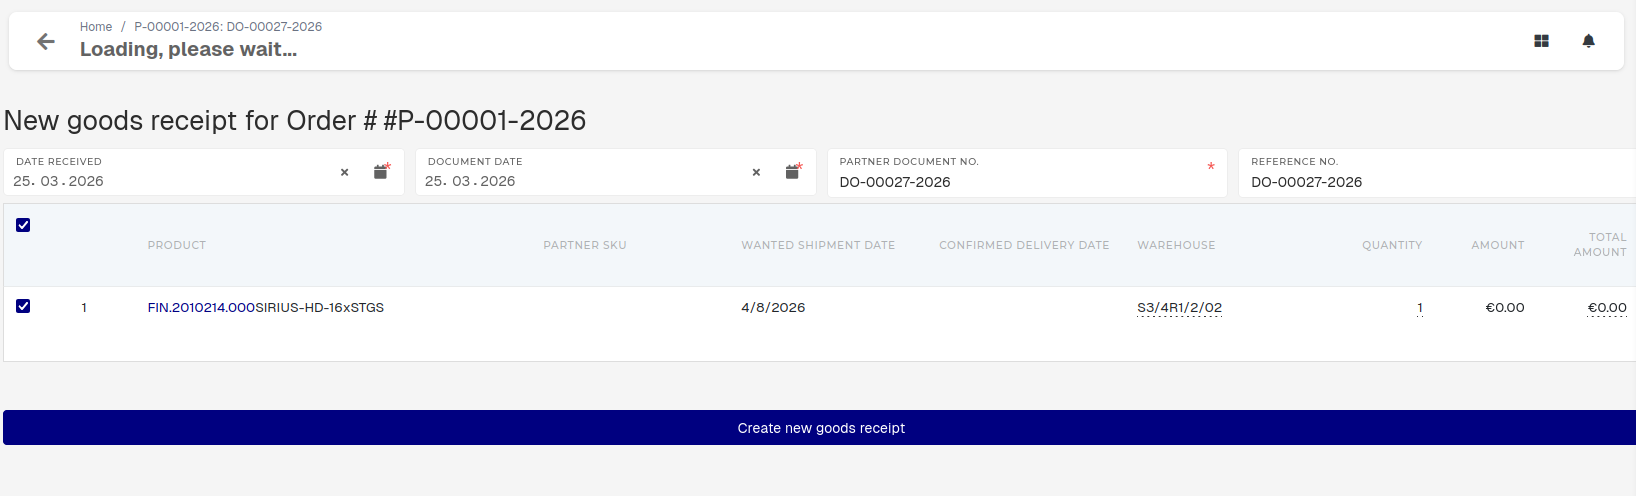 ***\#Q** What to do about counted quantity when product tracked by serials?* #### 4. Create a demo/rental sale order Create a new order with document type **"Rental Order"** or **"Demo Order"** and add the demo products as sale order items. 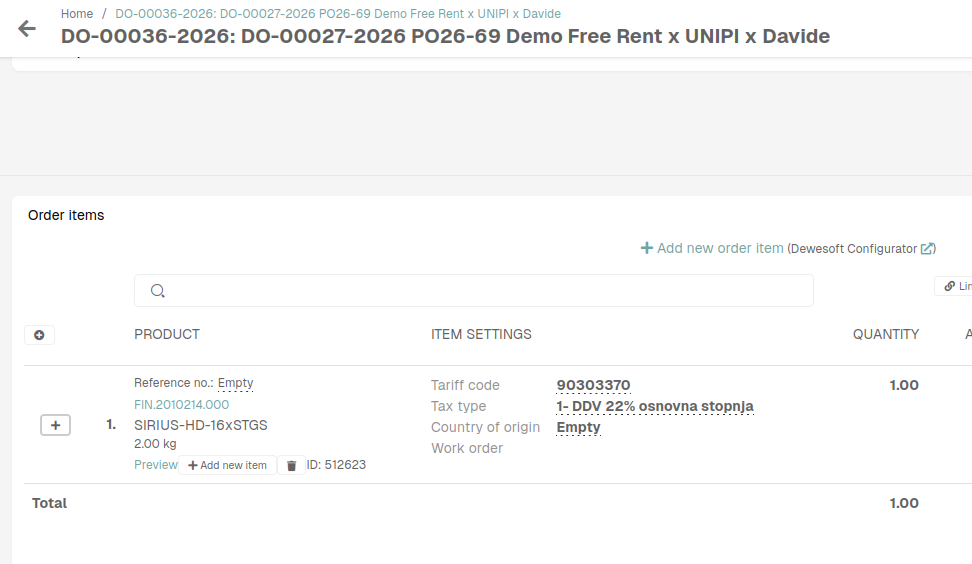Demo and Rental orders require information in the "**Rental and consignment information**" section.
 #### 5. Create a packing order and shipping list for Demo sale order To create a packing work order, click **"Create packing for selected order items"** in the **"Documents"** section. [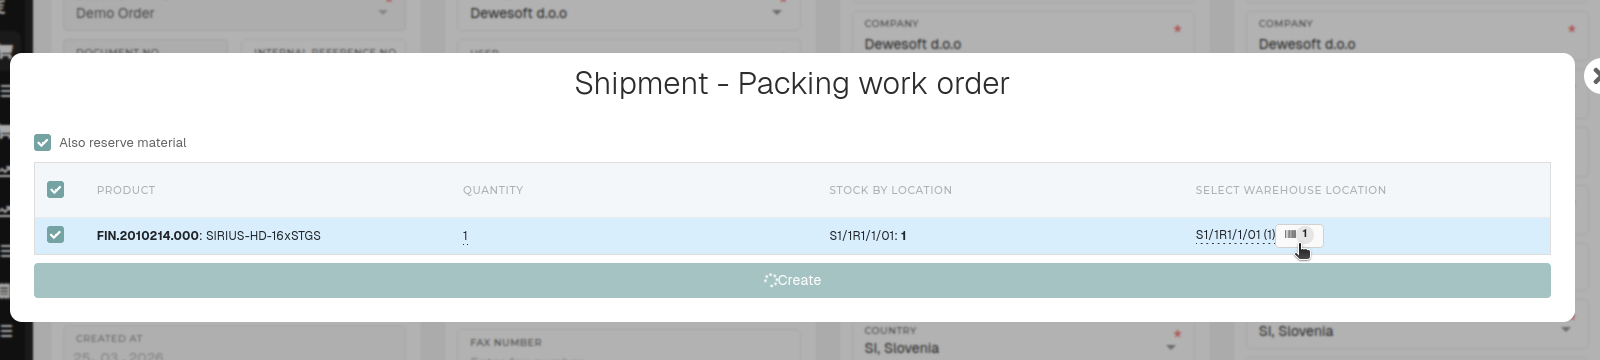](https://how-to-erp.dewesoft.com/uploads/images/gallery/2026-03/iH5image.png) Make sure that products are **"in stock"** and click on the item to enter product serials and and then click **"Create"** to make a new packing work order. After the packing work order is completed, click the "**+** **Documents"** button and add a shipping list for the packing work order. [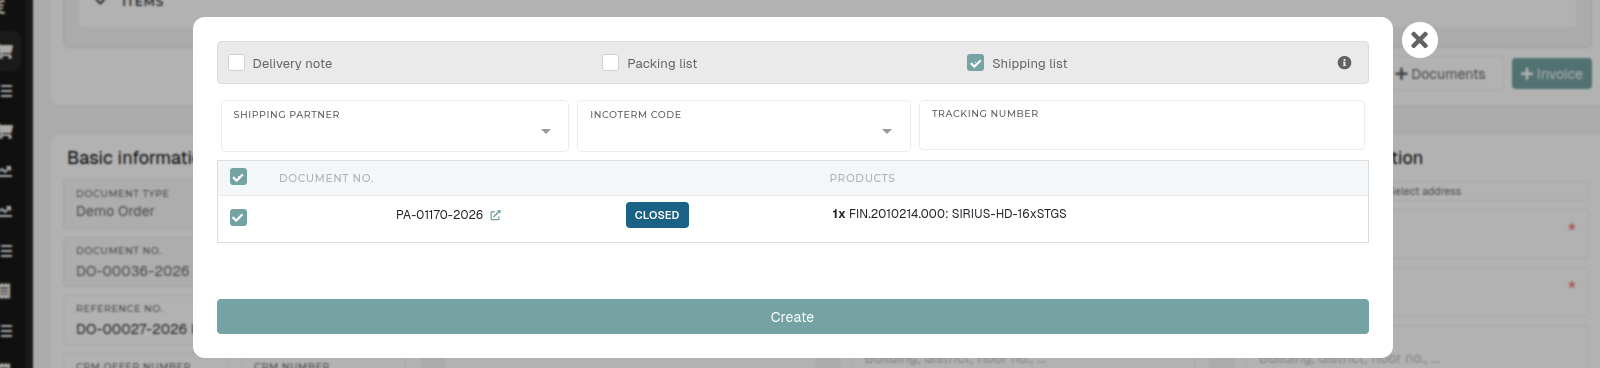](https://how-to-erp.dewesoft.com/uploads/images/gallery/2026-03/64Kimage.png) [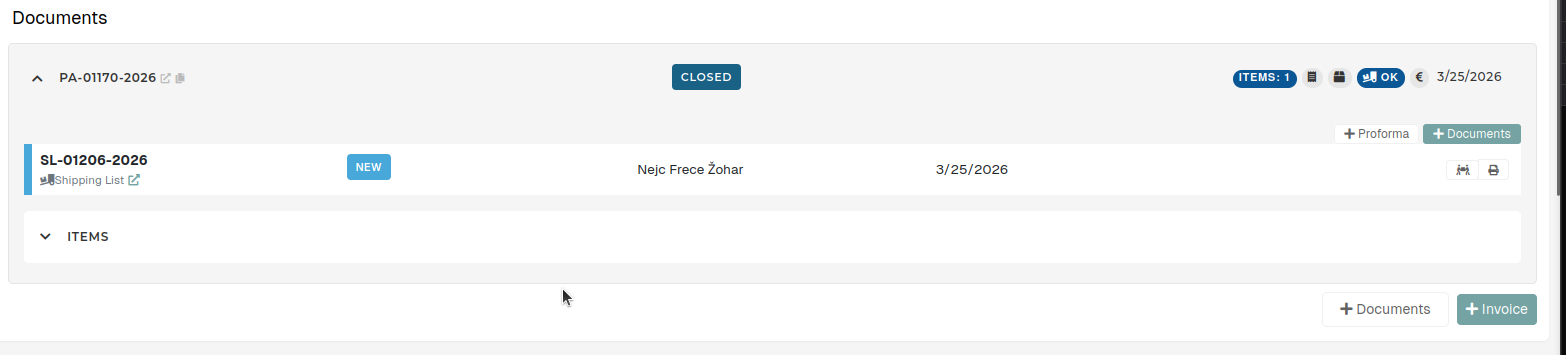](https://how-to-erp.dewesoft.com/uploads/images/gallery/2026-03/vUIimage.png) # Attach serial on sale orderThis action requires the **"view sales order"** and **"update sales order"** permissions.
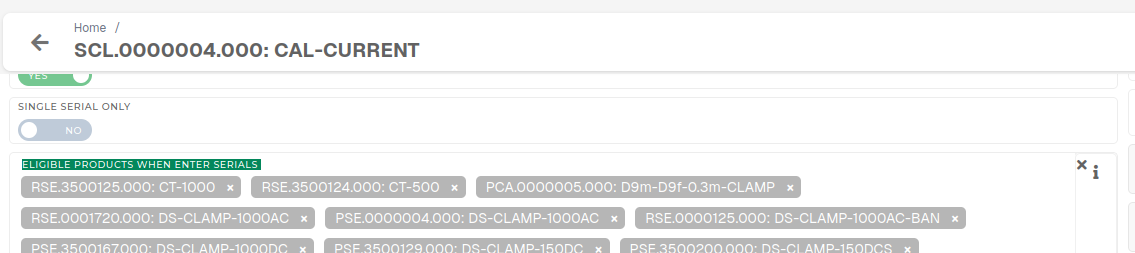
To attach a serial on order, find the serial's number and check its product and warehouse location. 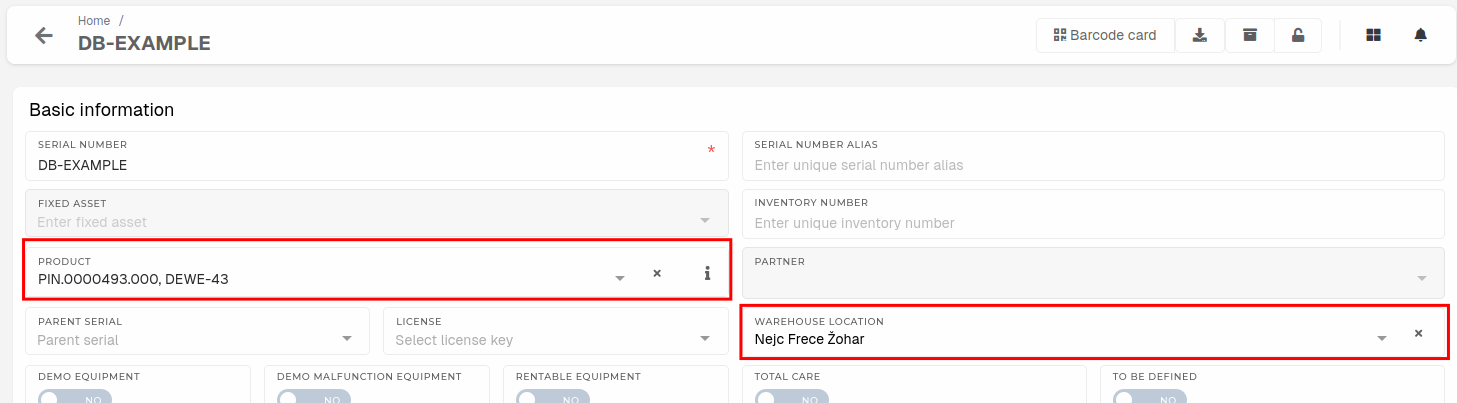 Open the order, where the serials should be attached and navigate to the **"order items"** section. 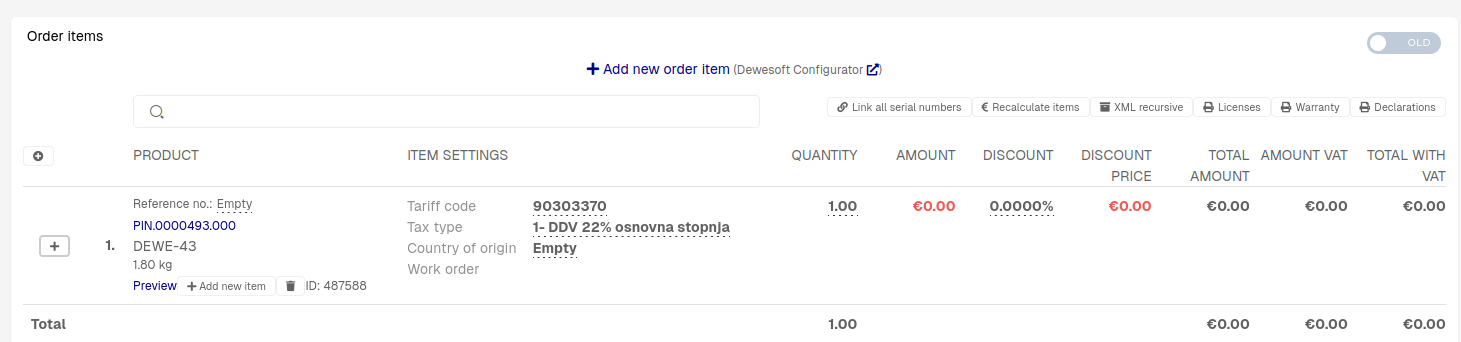 Click the "**+**" button to open order items sub-items (the serials should be attached to these).Serial should have the **same product** as the product of the order item. Exception to this rule are items with product type **Service** (e.g. SCL.0000004.000), where the serial should be any product on list of eligible products for that service.
The serial must also **be on your warehouse location** to appear in the dropdown.
Click the **"Link existing instrument serial number"** button to open a dropdown, where the serial can be selected. Once the serial is attached, click the **"Close"** button to hide the dropdown. 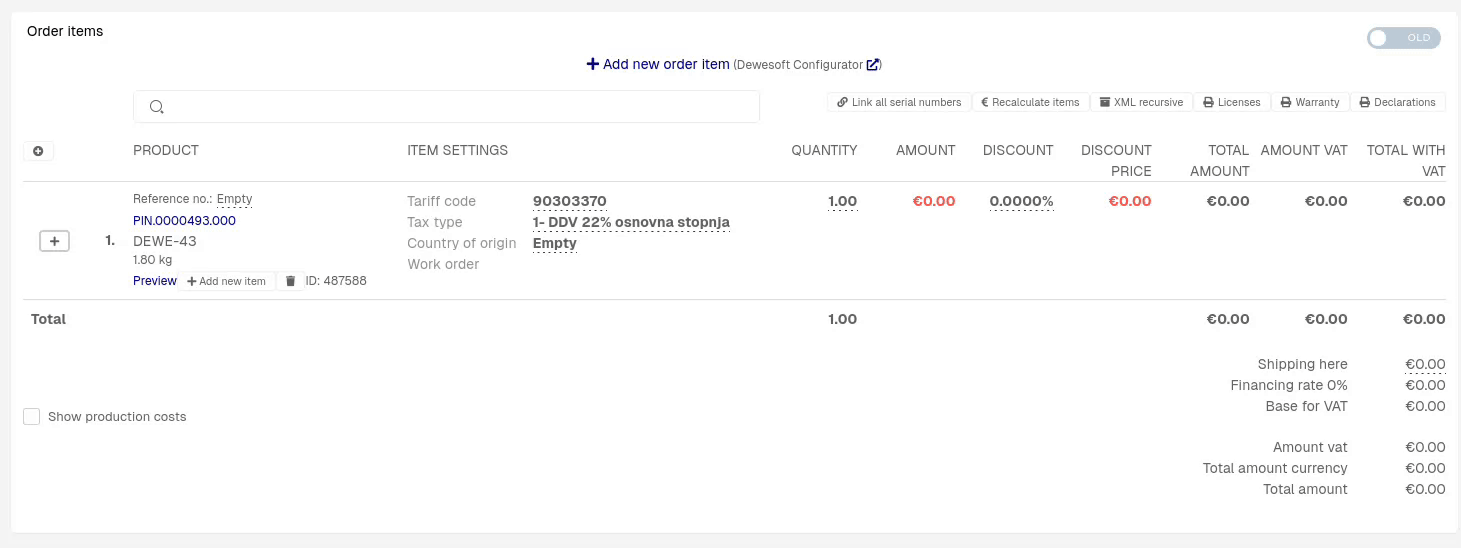 # Sales order items # Sales forecasts # Overview Sales forecasts are used in Sales to forecast a company profitability.. [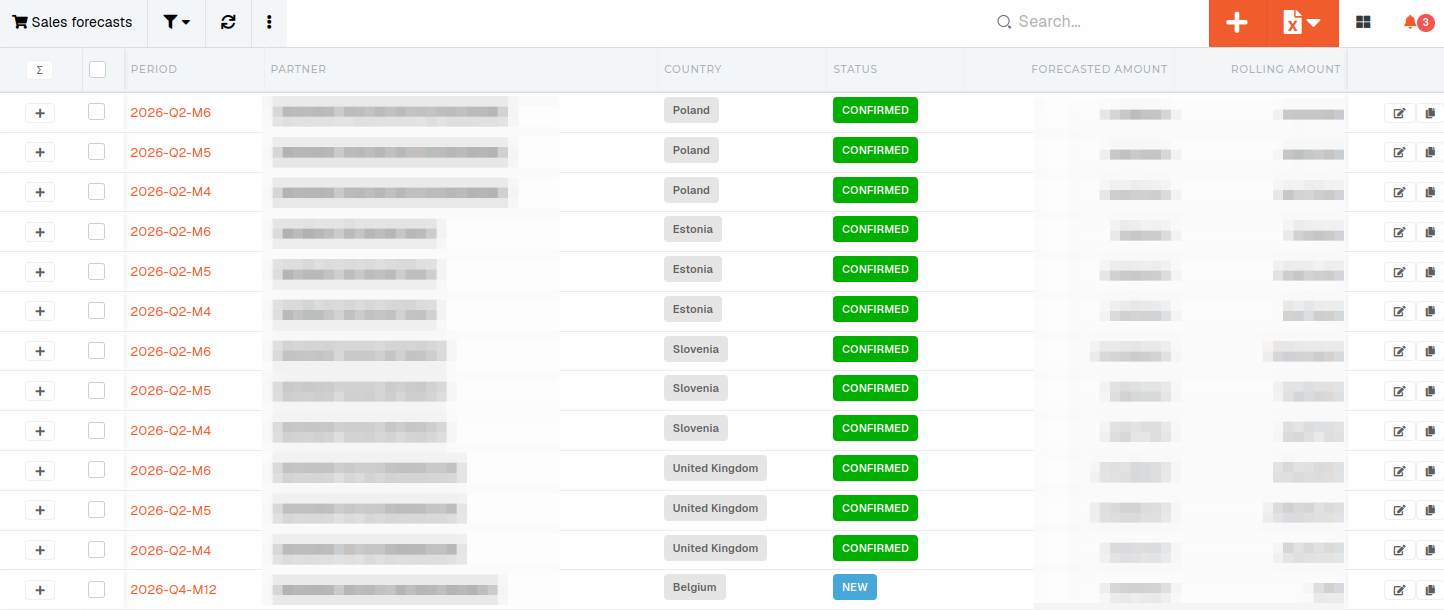](https://how-to-erp.dewesoft.com/uploads/images/gallery/2026-06/image.png) # Create new sales forecastThis action requires the **"Create sales forecast"** permission.
To create a new sales forecast, click the "**+**" button above the table. This will open a modal window, where the sales forecast timespan can be set.Forecasts are automatically created for the ERP's root partner.
 Once the timespan is selected, the page will redirect you to the sales forecast edit page, where can adjust the forecast categories where needed. 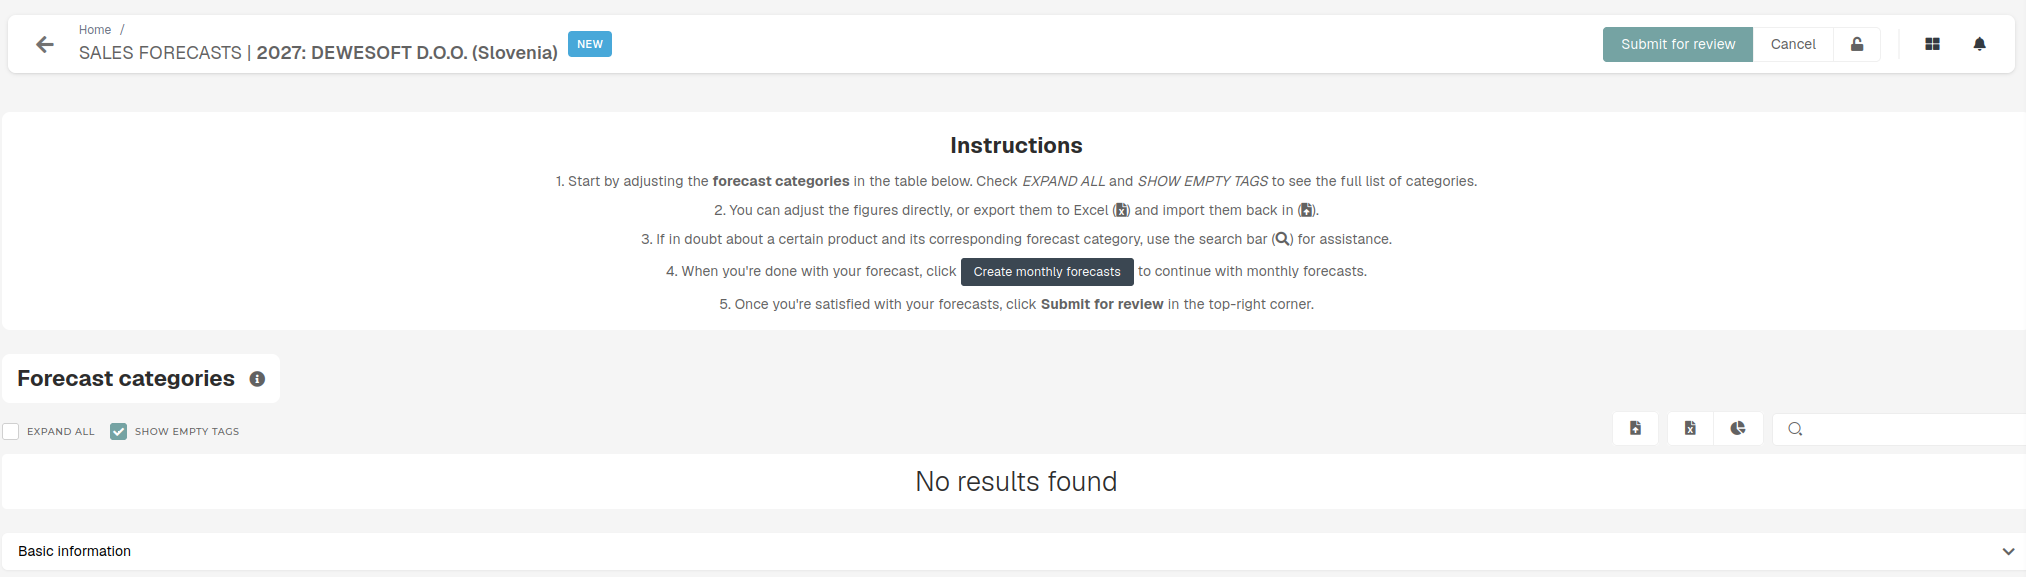 Once the forecast is finished, you can submit it for review, after which you will receive some feedback if required. # Historical sales view # Quotes # Quote items # Issued invoices # Calculation of origin **Keywords**: Kalkulacija porekla #### Components - **Selling** **price** - Price of item on order sale (sales order): The price with the included discount is taken per one piece. - **Material** **costs** - Concrete serial numbers and the material used on order items are taken - the country of origin of the material and the purchase price per lot are looked at. The latter originates from receiving. - **Type** **of** **product** **sold** - The type of product (product or reselling), that is being sold determines, what to perform in process. - **Company** **country** - The country, where the company, using the ERP, is located. - **Margin** - - Selling price - material costs. #### ProcessIf product type is reselling, it is always set 100% from the country of origin, which is set on receipt.
**If it is not reselling, but instead a product**, we calculate as follows: - 1. We add up the value of the installed material by country. 2. We add up material across the EU and outside the E. 3. If the **margin** **+ material** from the company's country is greater than the largest other country, the company's country (Slovenia) is taken. 4. If not, the country with the largest amount is taken. 5. If the total non-EU added-up amount is greater than 50% of the sales price (adjusted according to the EU-South Korea agreement), there is no preferential origin. # Issued invoice items # Delivery notes # Shipping lists # Packing lists # Incomes # Compensations # Received Invoices # Creating Invoices received This guide explains how to correctly fill out each field in the **“[Add Received Invoices](https://placeholder.erp/invoices-received/create)”** form. 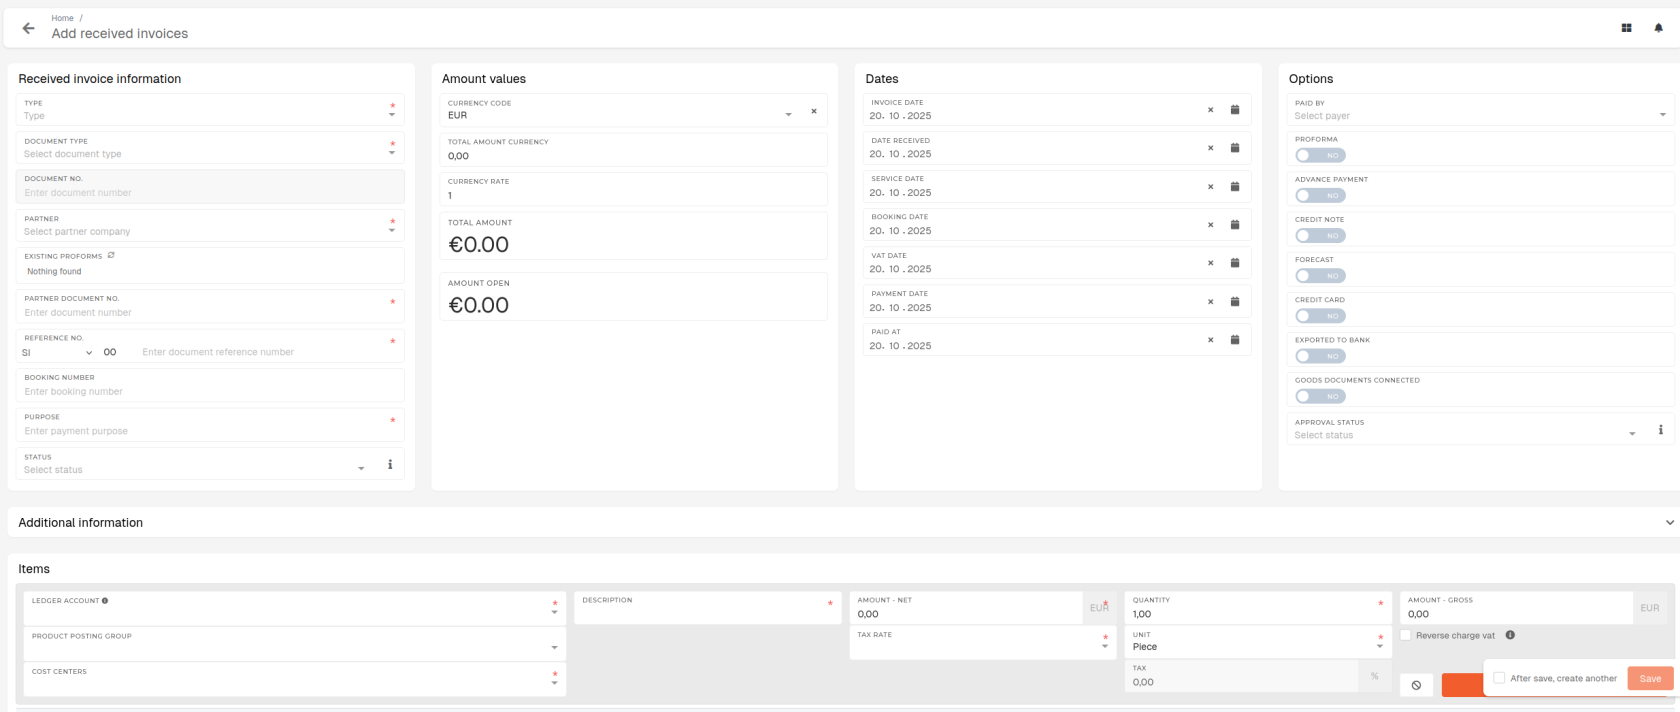 #### **Prerequisite requirements**Partner company must issue the invoice. **The invoice and the leader accounts** **must** already **be** **created** **in** the **ERP**.
#### **Received Invoice Information** 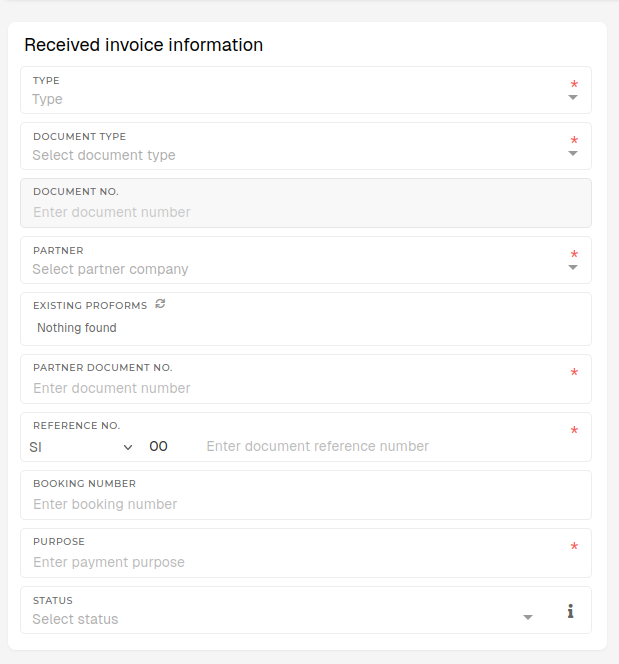 **Type** Select the invoice type (e.g., Purchase Invoice, Expense Invoice). This field is required. **Document Type** Choose the type of document (e.g. Invoice, Credit Note,...). This field is required. **Partner** Select the supplier or partner company issuing the invoice. Selected partner must already exist in ERP under the "Partners" section. This field is required. **Partner Document No.** Internal reference or invoice number from supplier (if different). This field is required. **Reference No.** Internal reference number for the invoice, used by your organization. This field is required. **Purpose** State the purpose of the payment (e.g., “Office Supplies”, “Consulting Fees”,...). This field is required. **Status** Choose the current document status (e.g., New, Paid,...). #### **Dates** Enter the appropriate dates using the calendar picker. 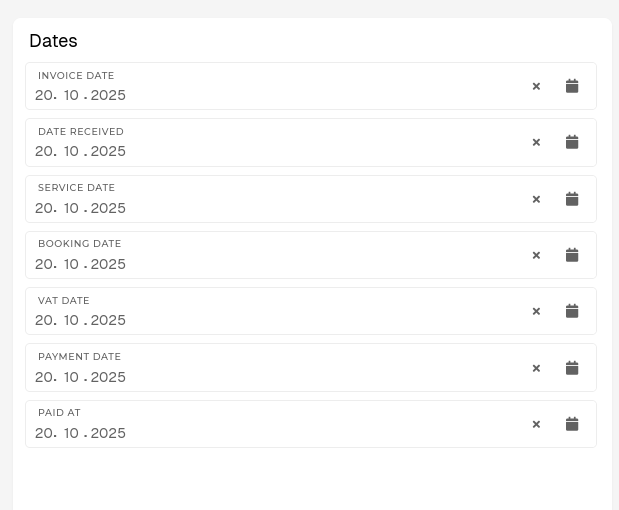 **Invoice Date** Date printed on the supplier’s invoice. **Date Received** Date your organization received the invoice. **Service Date** Date when goods or services were provided. **Booking Date** Date when the invoice is entered in your accounting records. **VAT Date** Date used for VAT/tax reporting purposes. **Payment Date** Planned date for payment to the supplier. **Paid At** Actual date when payment was completed. #### **Options** These switches and dropdowns define additional attributes of the invoice. [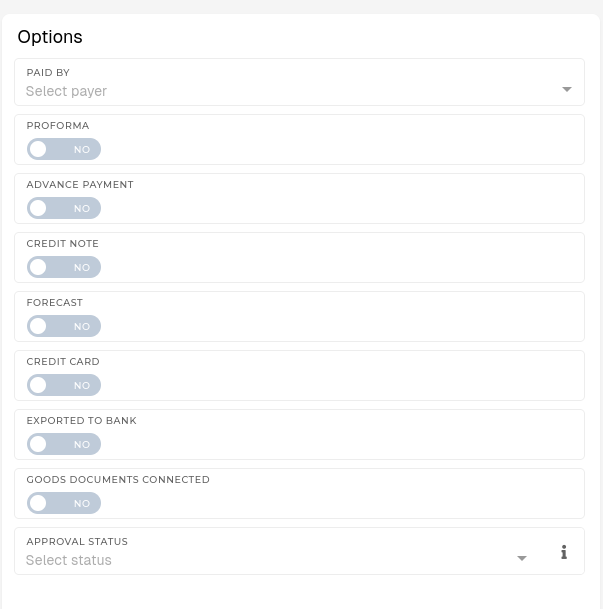](https://how-to-erp.dewesoft.com/uploads/images/gallery/2025-10/utvimage.png) **Paid By** Select, who is paying the invoice (department, cost center or account). **Proforma** Toggle ON, if the document is a proforma invoice. **Advance Payment** Toggle ON, if this is a prepayment invoice. **Credit Note** Toggle ON, if the invoice is a credit note (reduces balance). **Forecast** Toggle ON, if this invoice is part of a forecast, not an actual invoice record. **Credit Card** Toggle ON, if payment was made via credit card. **Exported to Bank** Toggle ON, if when this invoice has already been exported to a banking software. **Goods Documents Connected** Toggle ON, if invoice is connected to a delivery note or goods receipt. **Approval Status** Select invoice's current approval stage (Pending, Approved, Rejected,...). #### **Adding Items** Each row represents one invoice line item. You can add multiple items per invoice. New line items can be added with the **"Add New"** button.  **Ledger Account** Select the account where this cost will be booked. This field is required. **Product Posting Group** Choose the related product or service posting group. **Cost Centers** Assign the cost to a department, project or cost center. **Description** Describe the goods or services (e.g., “Printer Paper A4 500 sheets”). This field is required. **Amount** – **Net** Enter the net value (before tax). This field is required.**Tax Rate (%)** **Tax Rate (%)** Enter applicable TAX/VAT percentage. This field is required. **Quantity** Enter how many units were invoiced. This field is required. **Unit** Select the unit of measure (e.g., Piece, Hour, kg). This field is required. **Tax** Automatically calculated based on **Amount** – **Net** + **Tax Rate** values. **Amount** – **Gross** Enter the gross value (before tax). This field is required**.** **Reverse Charge VAT** Toggle this, if reverse charge rules apply for this invoice.**To book to specific campaign, the cost center must be set to that campaign.**