# Workflow approval
By clicking on your profile photo, you are taken to your workflow overview page. Here, you can see your monthly workflow, how much leave you have available and your work time statistics.
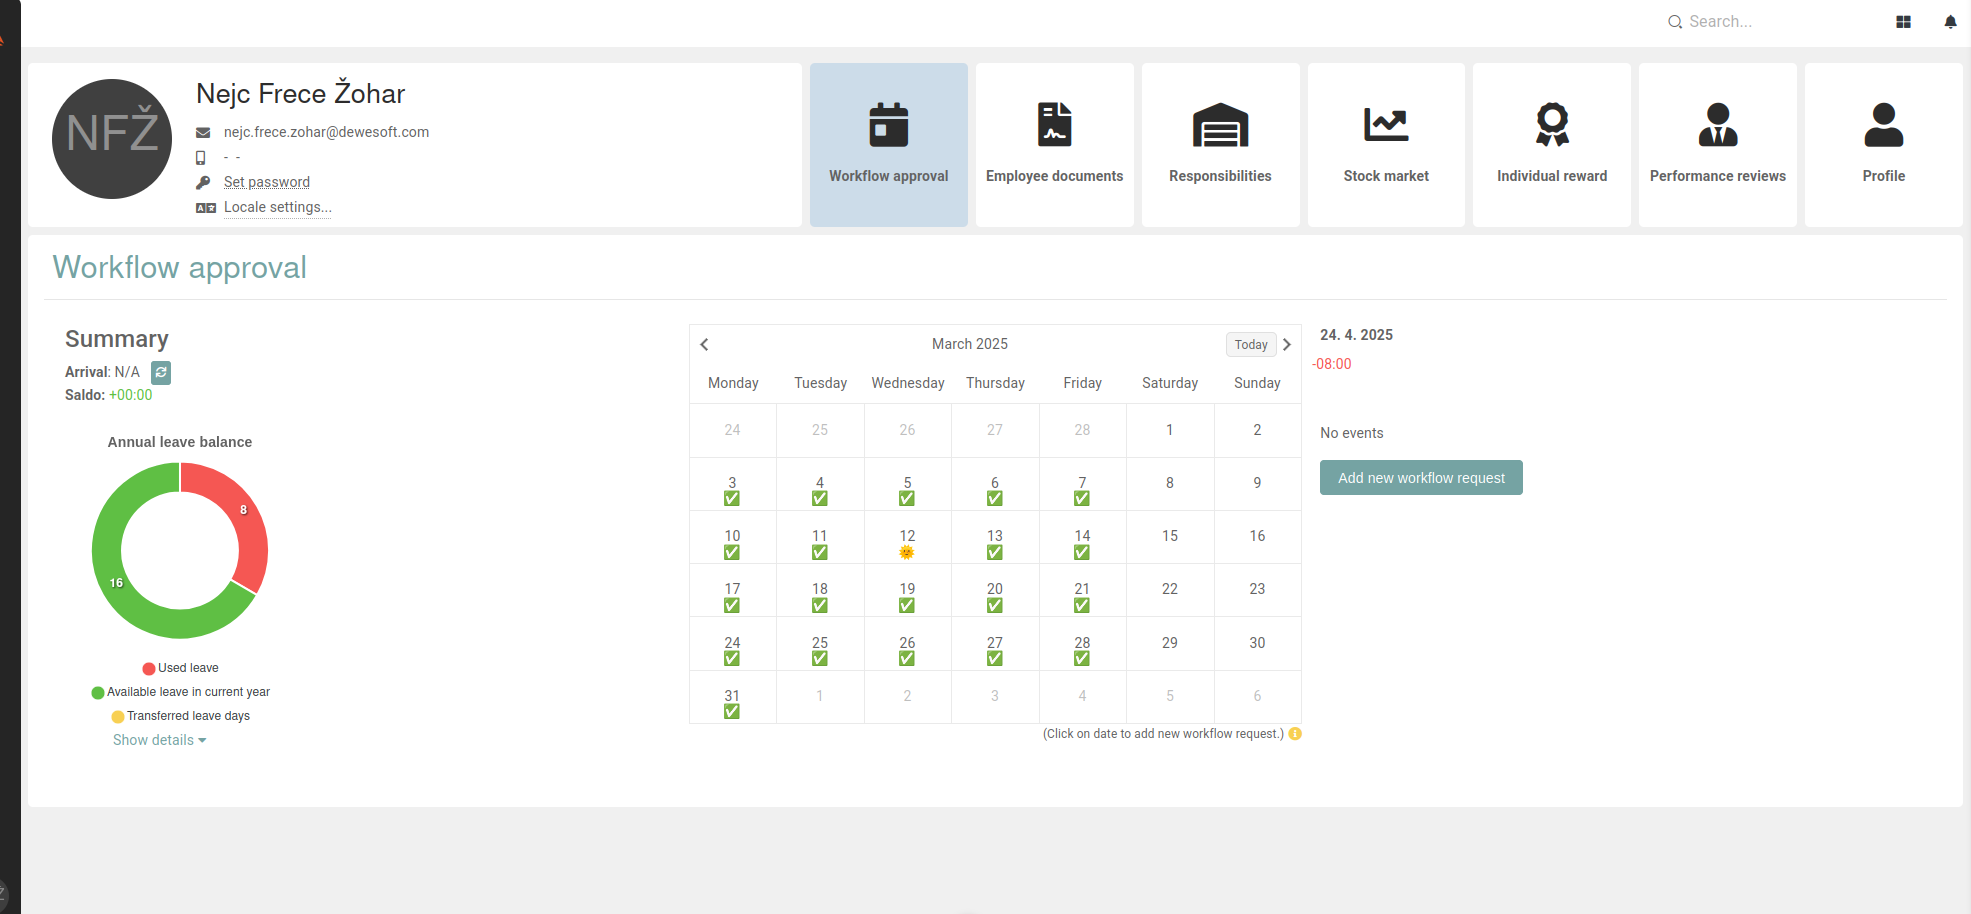
#### **Summary**
First thing is the Summary section, where the below information is displayed.
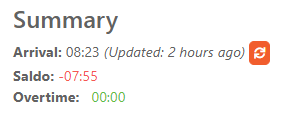
##### **Arrival**
Your time of arrival to work today. If you find N/A displayed instead of the time you arrived, there is nothing to worry about, arrival times are synched from the access control system at specific times of the day, usually around 8 AM and 4 PM.
Check your arrival time again after 8 AM. If you still see N/A, you can click the refresh button next to it, and if N/A is still displayed, contact your support team for further assistance.
##### **Saldo**
The amount of your work time remaining today. The time displayed here tells you, how many hours you have to do today to fulfill your daily quota.
At the start of the day, your saldo will always display as a negative number by default. At the end of the day (around 4 PM), after the work times sync, your saldo should be displayed as a positive number.
If you work over your daily quota, the overtime up to 3 hours will be taken into account the next day and your quota for the next day will be lower.
##### **Overtime**
The amount of your overtime in the current month.
#### **Annual leave balance**
This is the "**Annual leave balance**" graph, which displays your annual leave statistics.
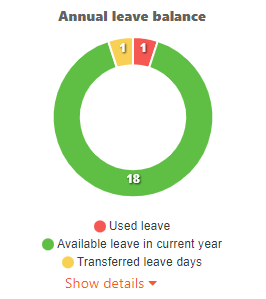
The graph color coding is explained in the legend under the graph:
| **Green** | Amount of your leave days in the current year. |
| **Yellow** | Your leave days, transferred from previous year. |
| **Red** | Your already used leave days. |
When you plan your leave of absence, the date you select is taken into account. If your planned leave is set before July 30, your leave days, transferred from the previous year will be used first.
On clicking **Show details,** a list with all the dates on which you had a vacation in the current year, is displayed.
**IMPORTANT:**
The graph shows the amount of **still available vacation days as green/yellow** and amount of **already used days as red.** When your vacation workflow requests are approved, the amount of your vacation days is automatically updated to reflect that.
**Example:** *A user has 18 vacation days available and creates a workflow request for a 5-day vacation next month. **Once that request gets approved** by the user's lead, **those 5 days will count as already used** **and will be shown as such on the graph**. However, should the user decide that they don't want the vacation anymore, they can talk to their lead or contact HR department to cancel the workflow request, which returns those 5 vacation days from used (red) back to available (green/yellow).*
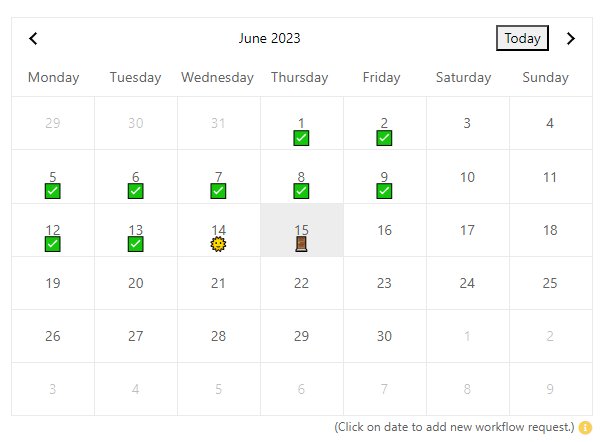
#### **Workflow calendar**
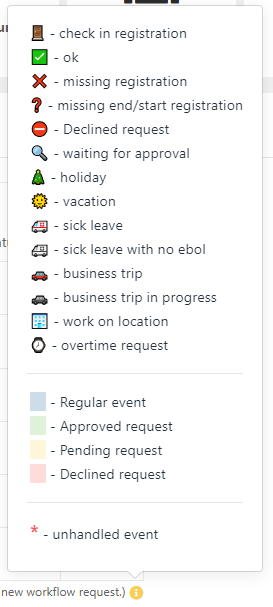
The calendar on this page visually shows the data for the given month. Clicking on the yellow exclamation mark by the bottom right corner of the calendar displays a legend that explains every symbol's meaning and day coloration meaning.
| 
| 
|
To add workflow request, click on a day in the calendar. That displays that day's workflow events next to the calendar. And above them, under the date, your day's work time quota is shown.

On clicking the **Add new workflow request** button, a modal appears, that allows you to add a new workflow request.
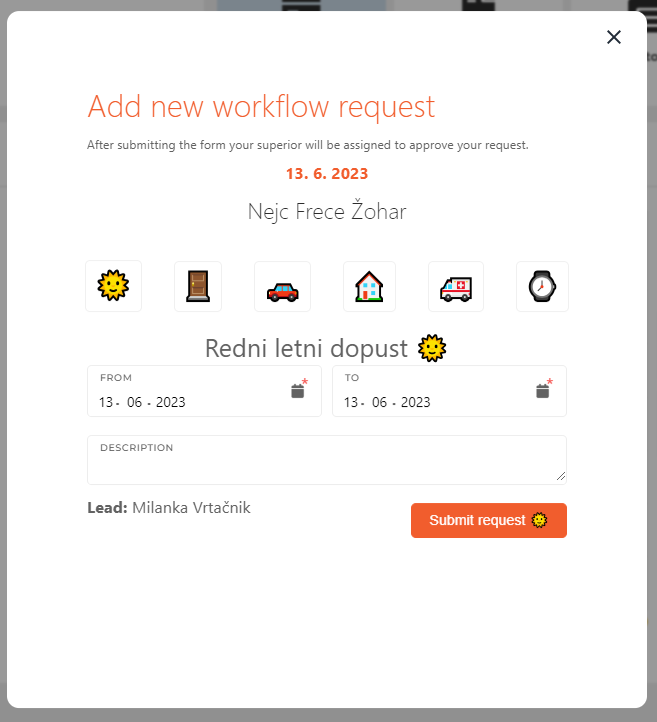
On opening the modal, you only see the six button under your name. Select the type of your new workflow request, fill out the form and submit your request to be reviewed by your lead, who will then approve or deny the request.
Workflow requests of different types have different forms, so make sure to look over your filled out form before submitting.
After submitting a request, the date you selected in your request will be shown with a magnifying glass icon while in review.