
AGV Control Panel
Use this page when something on the AGV Control Panel is not going the way you expect.
How to use it: find the part of the panel you are looking at (the parts are listed in the same order as on the screen), find your problem in the If something is wrong list, and do the steps. If your problem is not listed, go to the last part, Asking for help.
Three rules that solve half of all problems:
- Press Refresh first (the round-arrows button in the section). Sections do not update by themselves unless autoupdate is ticked.
- Read the pop-up before you confirm. Every button that changes something asks you first.
- Do not guess. If you are not sure which button is right, ask before pressing.
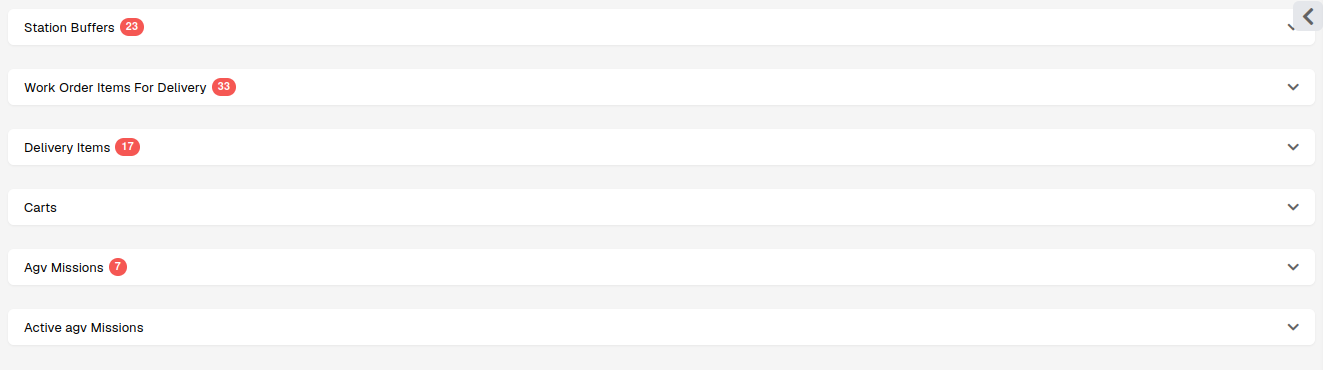
1. Station Buffers
What you see. One line per station (one line per person). The coloured badge says whether the person is at work (present), has a shift later today (scheduled) or has no shift today (absent). The numbers say how much work is already waiting at that station and until when the person will be busy. Click a line to see the work orders behind the numbers.
What you can do. Look, search and filter. Nothing here changes anything.

If something is wrong:
- A station is missing. The person has no shift today, or the station is not set up for AGV. Check the shift calendar first. If the shift is there, ask support.
- Red text
no AGV nodeunder a station. The robot cannot deliver there. Ask support to link the station's location to an AGV node. - A red box above the table. The automatic planner has switched itself off because of a setting. Copy the text and send it to support. Deliveries can still be made by hand (parts 2, 3 and 5).
- The bar is red (100 % or more). The station is full. The planner will not send more material there until the person works some off. If it must go now, plan it by hand (parts 2, 3 and 5).
- Badge says
absentbut the person is here. The shift calendar is wrong. Have the shift entered; the planner only counts people with a shift. - The hourglass icon. The time shown runs past all known shifts. It is the earliest possible time, nothing is broken.
2. Work Order Items For Delivery
What you see. Work order items that could be delivered by the robot but are not planned yet. Normally the planner takes them from here by itself.
What you can do. Press Create in a line, then Create again in the pop-up. The item becomes a delivery item and moves to part 3.

If something is wrong:
- The work order item is not in the list. Check these four things:
- Is the material at the wall (in the AGV warehouse)?
- Is its next operation an AGV operation?
- Does that operation have a station (resource) assigned?
- Is it perhaps already planned? Look in parts 3, 5 and 6.
- Message
Assigned resource on technology not available…. The operation has no station. Assign the station on the work order item, then try again. - Message
some OPFB's are still assigned in AGV cart. A box of this item is still registered on a cart in the system. Go to part 4, find the box and remove it there. Do this only if the box is really not on that cart. - Red warning triangle next to the work order number [Upcoming]. The material has been at engraving longer than allowed. Check with engraving before you send it.
3. Delivery Items
What you see. Delivery items that are planned but not on a mission yet. A mission is one cart trip.
What you can do. Press Mission, choose a mission in the list (it shows the mission number and how many of the 8 slots are used), press Add. The item moves to that mission in part 5.

If something is wrong:
- The list of missions is empty. Either there is no mission in preparation (make one in part 5, button Create Mission) or every mission is too full for this item's boxes.
- The item keeps jumping between here and a mission. The planner is moving it. This is normal today. [Upcoming] Items you add to a mission by hand stay there.
- Message
Delivery … is already started. That mission is already on its way. Refresh and choose another mission. - Message
Delivery item is not free to be assigned[Upcoming]. Somebody (or the planner) just moved the item. Refresh and look for it in part 5.
4. Carts
What you see. Every AGV cart with its 8 slots. Green blocks are boxes the system believes are on the cart. The label reads box – work order item – wall location. The section loads when you open it; press Refresh to reload.
What you can do. Check what is on a cart. Move the mouse over a box and press × to remove the box from the cart in the system only. The real box is not touched.
📷 Figure 5 – placeholder: one cart with a box hovered and the × visible.
If something is wrong:
- A box is shown but is not on the cart in reality. Hover the box, press ×. Then continue with what you were doing (for example part 2, Create).
- A box is on the cart in reality but not shown. Do not add it by hand. The runner must load it through the loading task; ask the runner.
- A label shows
???. Press Refresh. If it stays, tell support the cart number and box number. - You cleared a box of a mission that is driving. Tell the runner and the operator of that station at once; the box will not be expected at the station.
5. Agv Missions
What you see. Missions that are being prepared. They are not started; no runner and no robot knows about them yet. Each line shows the cart (or No cart), the load (for example 5 / 8) and the delivery items on it.
What you can do.
- Create Mission – a new, empty mission.
- Pencil next to the cart – choose a free cart, press Apply.
- Remove in the item list – take an item off the mission (it goes back to part 3).
- Start – send the mission to the runner. Confirm the pop-up.
- Delete – remove the mission; its items go back to part 3.
To send a mission on its way, do this:
- Check the items on it (the item list under Deliveries).
- Attach a cart with the pencil, Apply.
- Press Start, then confirm.
- The mission moves to part 6 with status Waiting for material. The runner now gets the task Runner Load Cart. [Upcoming] The runner also gets a violet alert on the screen.

If something is wrong:
- Start is grey. The mission needs a cart and at least one box. Attach a cart; if the load shows
0 / 8, the items have no boxes – check the work order. - Message
Invalid cart. The cart is on another mission or is not an AGV cart. Press the pencil again to reload the list and pick another one. - No free cart in the list. All carts are out. Wait until a mission in part 6 is Closed, or force close a stuck one (part 6).
- Message
Mission is already in progress!orMission already started. Somebody started it meanwhile. Refresh; you will find it in part 6. - Message
Mission has no cart assigned[Upcoming]. Attach a cart first. - The planner put the wrong items together. Press Remove on the items you do not want; they go back to part 3 and the planner may place them elsewhere.
- A mission is empty and useless. Press Delete.
6. Active AGV Missions
What you see. Missions that are being loaded, driving or coming back. Tick autoupdate so the list refreshes every 5 seconds. Each mission shows its status and its items with their status.
What you can do. Move the mouse over an item to see three small buttons, and use the red × in the table header to force close the whole mission.
| Button | Use it when |
|---|---|
| 🚫 Abort | The station no longer needs the item; the robot should skip it |
| « Return to wall | The item is Failed and its boxes are physically back on the wall |
| » Manually deliver | The boxes reached the station but the item did not finish in the system |
| red × Force close | The mission cannot be finished normally (robot stuck, cart lost) |
📷 Figure 7 – placeholder: an item line hovered, the three buttons and the red × marked.
- Abort. Confirm. The item becomes Failed, the robot continues to the next stop, the boxes come back with the cart. Not possible after the material was already transferred.
- Return to wall. Tick every box in the list as you check it is back on the wall, then confirm. The item is free again (status New) and can be planned anew.
- Manually deliver. Tick every box, check the location (change it if the boxes ended up somewhere else), confirm. The item is finished and the material is booked to that location.
- Force close. Read the warning. Tick send home if the robot is still out with the cart. Confirm. All open items are closed and booked to their destination, the mission is Closed. Check the real stock afterwards.
If something is wrong:
- Status stays Waiting for material. The runner has not finished loading. Ask the runner about the task Runner Load Cart.
- An item stays Delivered for a long time. The robot is at the station but nobody accepted the delivery. Remind the operator; after the time limit the item fails by itself.
- An item is Failed. The operator declined, did not answer in time, or the item was aborted. When the cart is back, the runner gets the task Escalate Cart to bring the boxes to the wall. After that, use Return to wall if the item is still shown.
- Status Partially delivered. Some items failed; the runner must finish the Escalate Cart task. Then the mission closes.
- Message
Delivery is already moved. The material was already transferred; there is nothing to abort. Use Manually deliver if the item is still open. - Message
Work order item has already been transferred. The item cannot go back to the wall because its material is no longer there. Ask support. - Red message
failed to send homeafter Force close. The robot did not get the command. Send it home from the AGV Robots page (move vehicle) or ask the robot operator. - A warning triangle in the top bar of the screen [Upcoming]. The live connection to the server is down; what you see may be old. Press Refresh or reload the page (F5). The triangle disappears by itself when the connection is back.
7. Outside the panel – who does what
- Runner (warehouse): gets Runner Load Cart. Scans the cart, loads each box into the slot shown on the screen, brings the cart to the pick-up point, scans the station and confirms. Then the robot leaves.
- Operator (station): gets the prompt Accept AGV Delivery with a countdown and the buttons Accept and Decline. After accepting, takes the boxes off the cart and confirms them.
- Runner again, at the end: if items failed, gets Escalate Cart and brings the boxes back to the wall.
8. Words and statuses
Mission (one cart trip):
| Status | Meaning |
|---|---|
| New | Being prepared (part 5) |
| Waiting for material | Runner is loading |
| In progress | Robot is driving the stops |
| Returning | All stops done, cart coming back |
| Partially delivered | Cart back, some items failed |
| Closed | Finished |
Delivery item (one work order item on a trip):
| Status | Meaning |
|---|---|
| New | Planned, waiting |
| Assigned | On a mission that has not started |
| In progress / In transit | Robot is driving to its station |
| Delivered | Robot arrived, waiting for Accept |
| Confirmed | Operator accepted, unloading |
| Completed / Closed | Done, material booked |
| Failed | Not delivered; needs Return to wall or Manually deliver |
Other words: box = one container of material (serial number OPFB-…); cart = trolley with 8 slots; station = the workplace of one person; node = the point on the robot's map that belongs to a station; planner = the automatic process that plans and groups deliveries.
9. Asking for help
When you contact support, send this information, and the problem is usually solved in one go:
- Which part of the panel (1 to 6) and which button you pressed.
- The mission number (
AGV-…) and the work order item number (DNS-…). - The box number (
OPFB-…) and the cart number, if boxes are involved. - The exact text of the message on the screen (a screenshot is best).
- What you expected to happen and what happened instead.