Setting up new printer
To setup a new printer, the ERP Printer application is required. For first-time setup, you will have to contact Web team for assistance with acquiring ERP Printer application and setting up of the application ERP authentication.
The first thing to do is to create a new printer entry in the "printers" table create form..
Once the ERP Printer application is acquired and authentication setup is finished, setting up new printers can skip this step.
Connect the printer to the computer, where it will be located and perform the printers setup, including installing correct drivers...
The printer's computer will need (at least) Python 3 installed for the ERP Printer application to work.
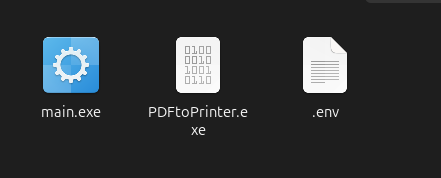
- Locate the "ERP Printer" application folder and open it. There should be the 3 files in directory:
- A "main" software file
- A PDFtoPrinter program
- The environment file. If it does not exist, create a new file named, ".env"
Open the environment file and copy into it the generated "secret" of the new printer, which was created earlier. The contents of the file should be:
ERP_PRINTER_SECRET=your-new-printer-secret-goes-hereAfter the environment file has been created/updated, start the "main" printer software.
After the command line window opens, a list of available registered printers will be show.
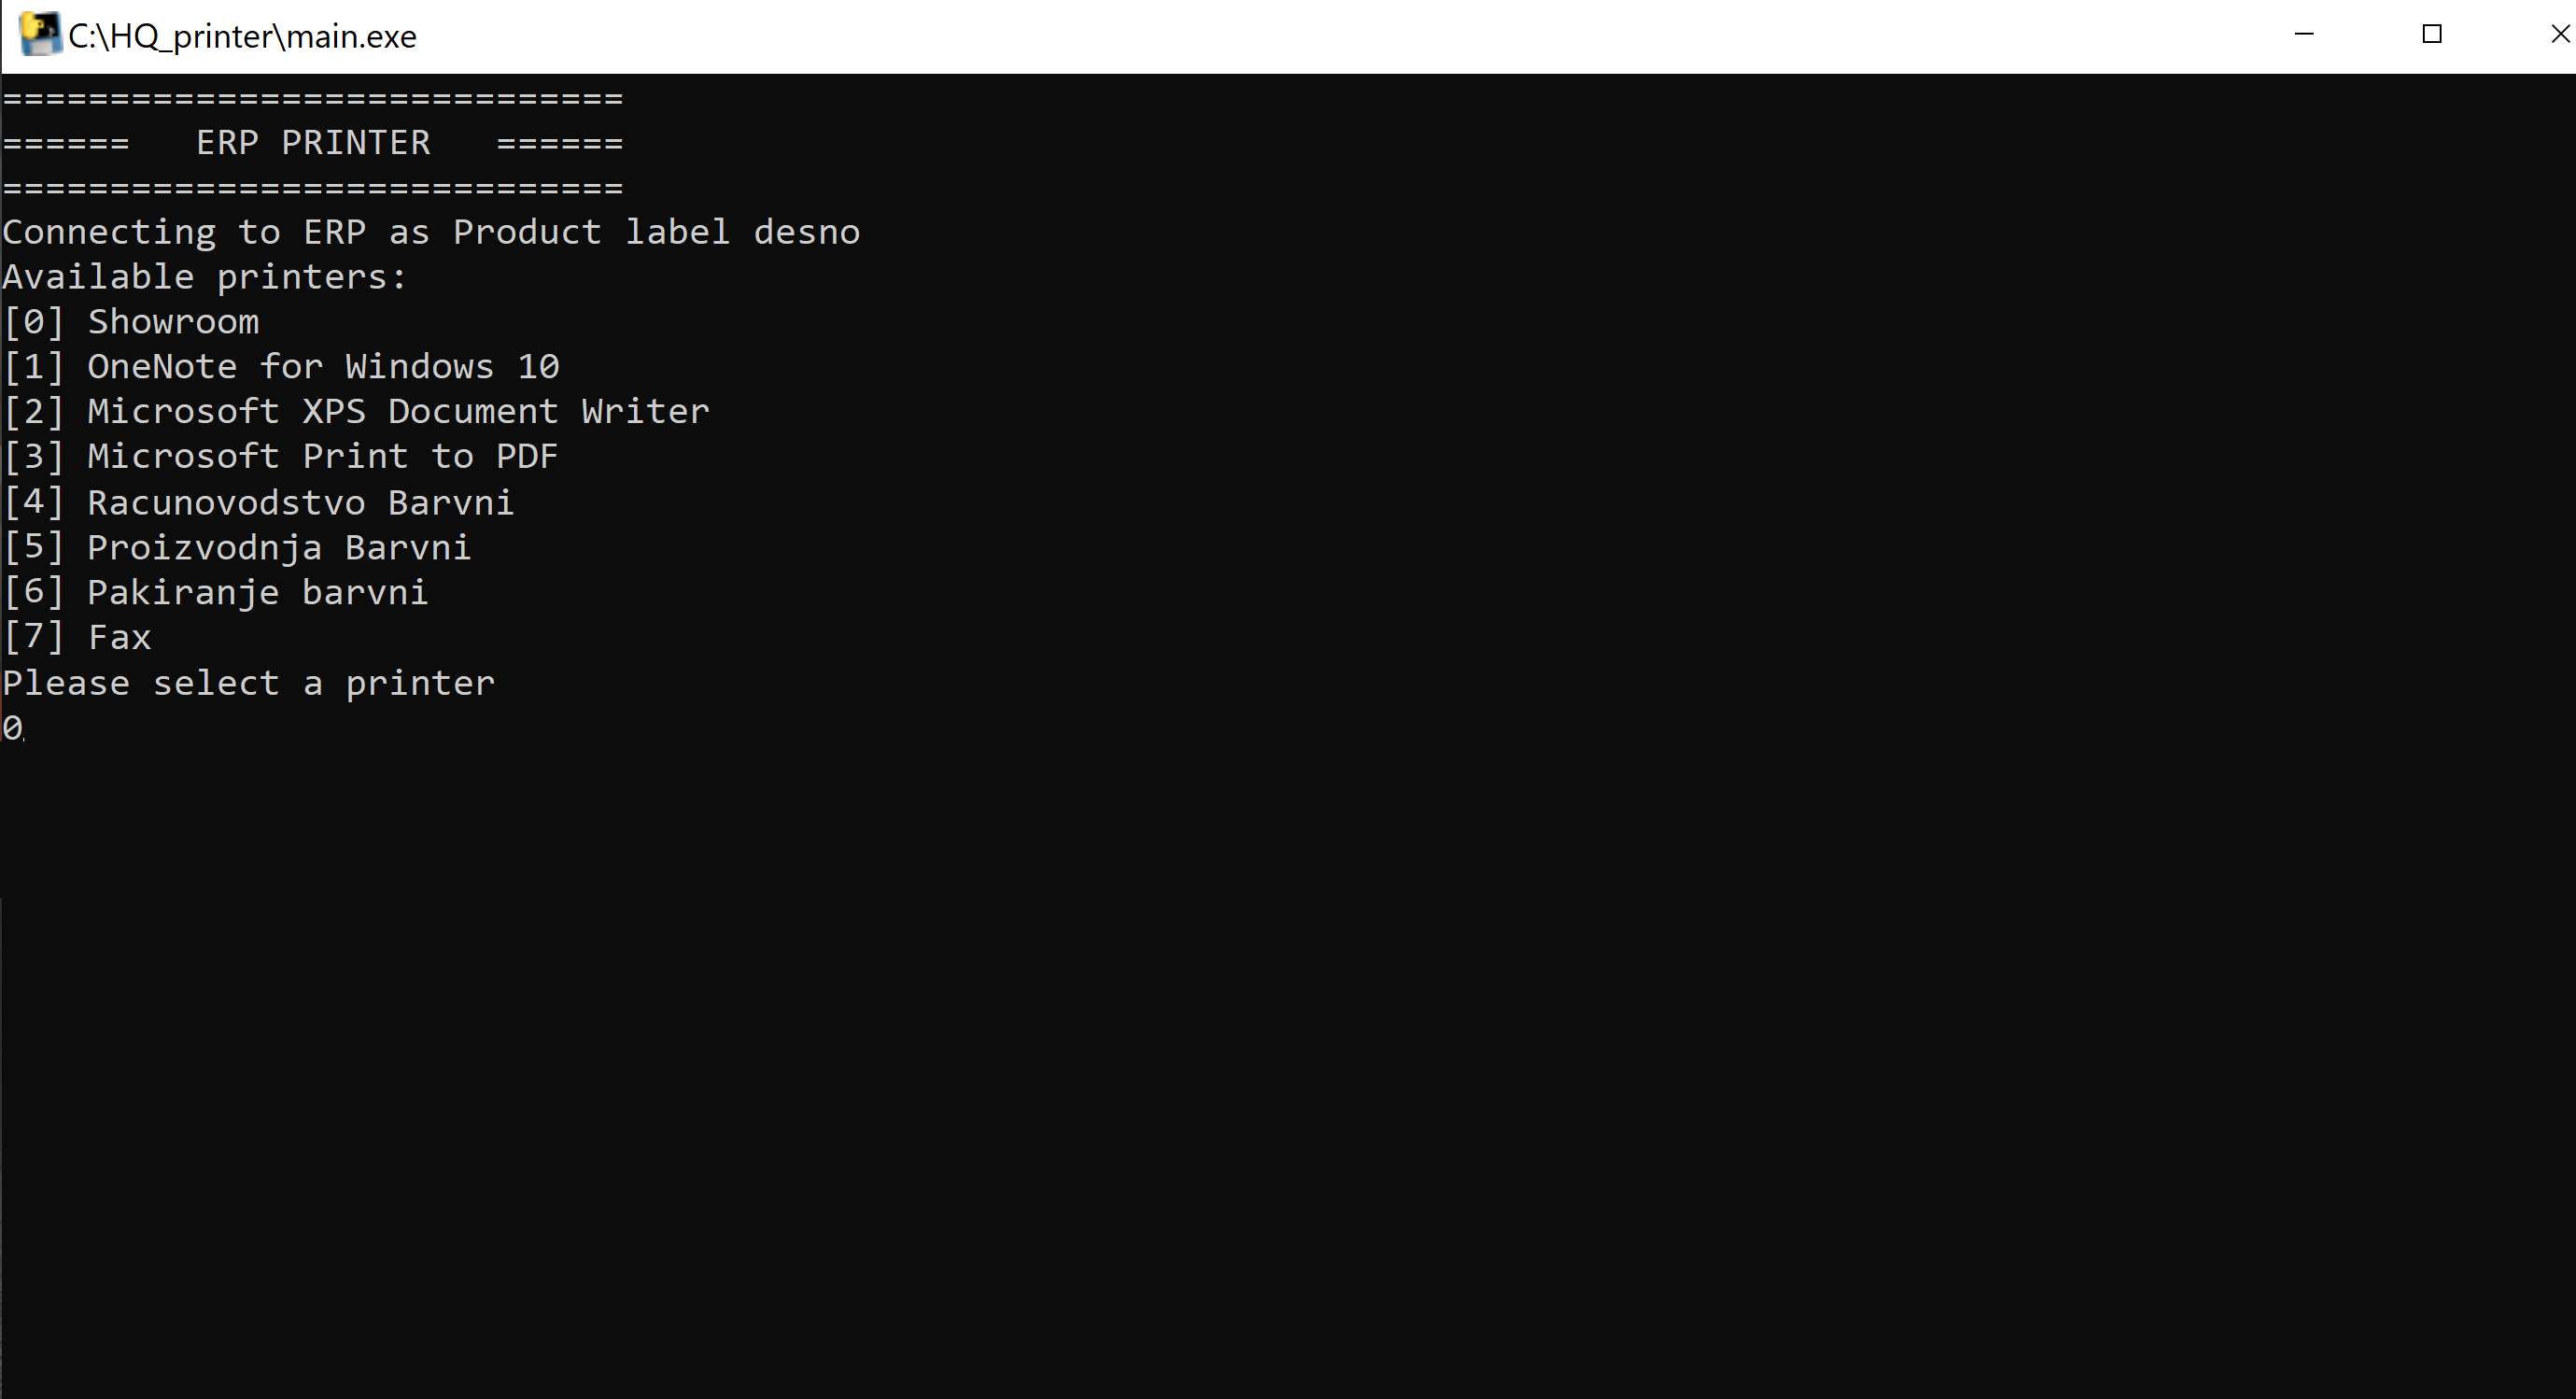
Make sure that your new printer is listed, otherwise troubleshooting of drivers will be required.
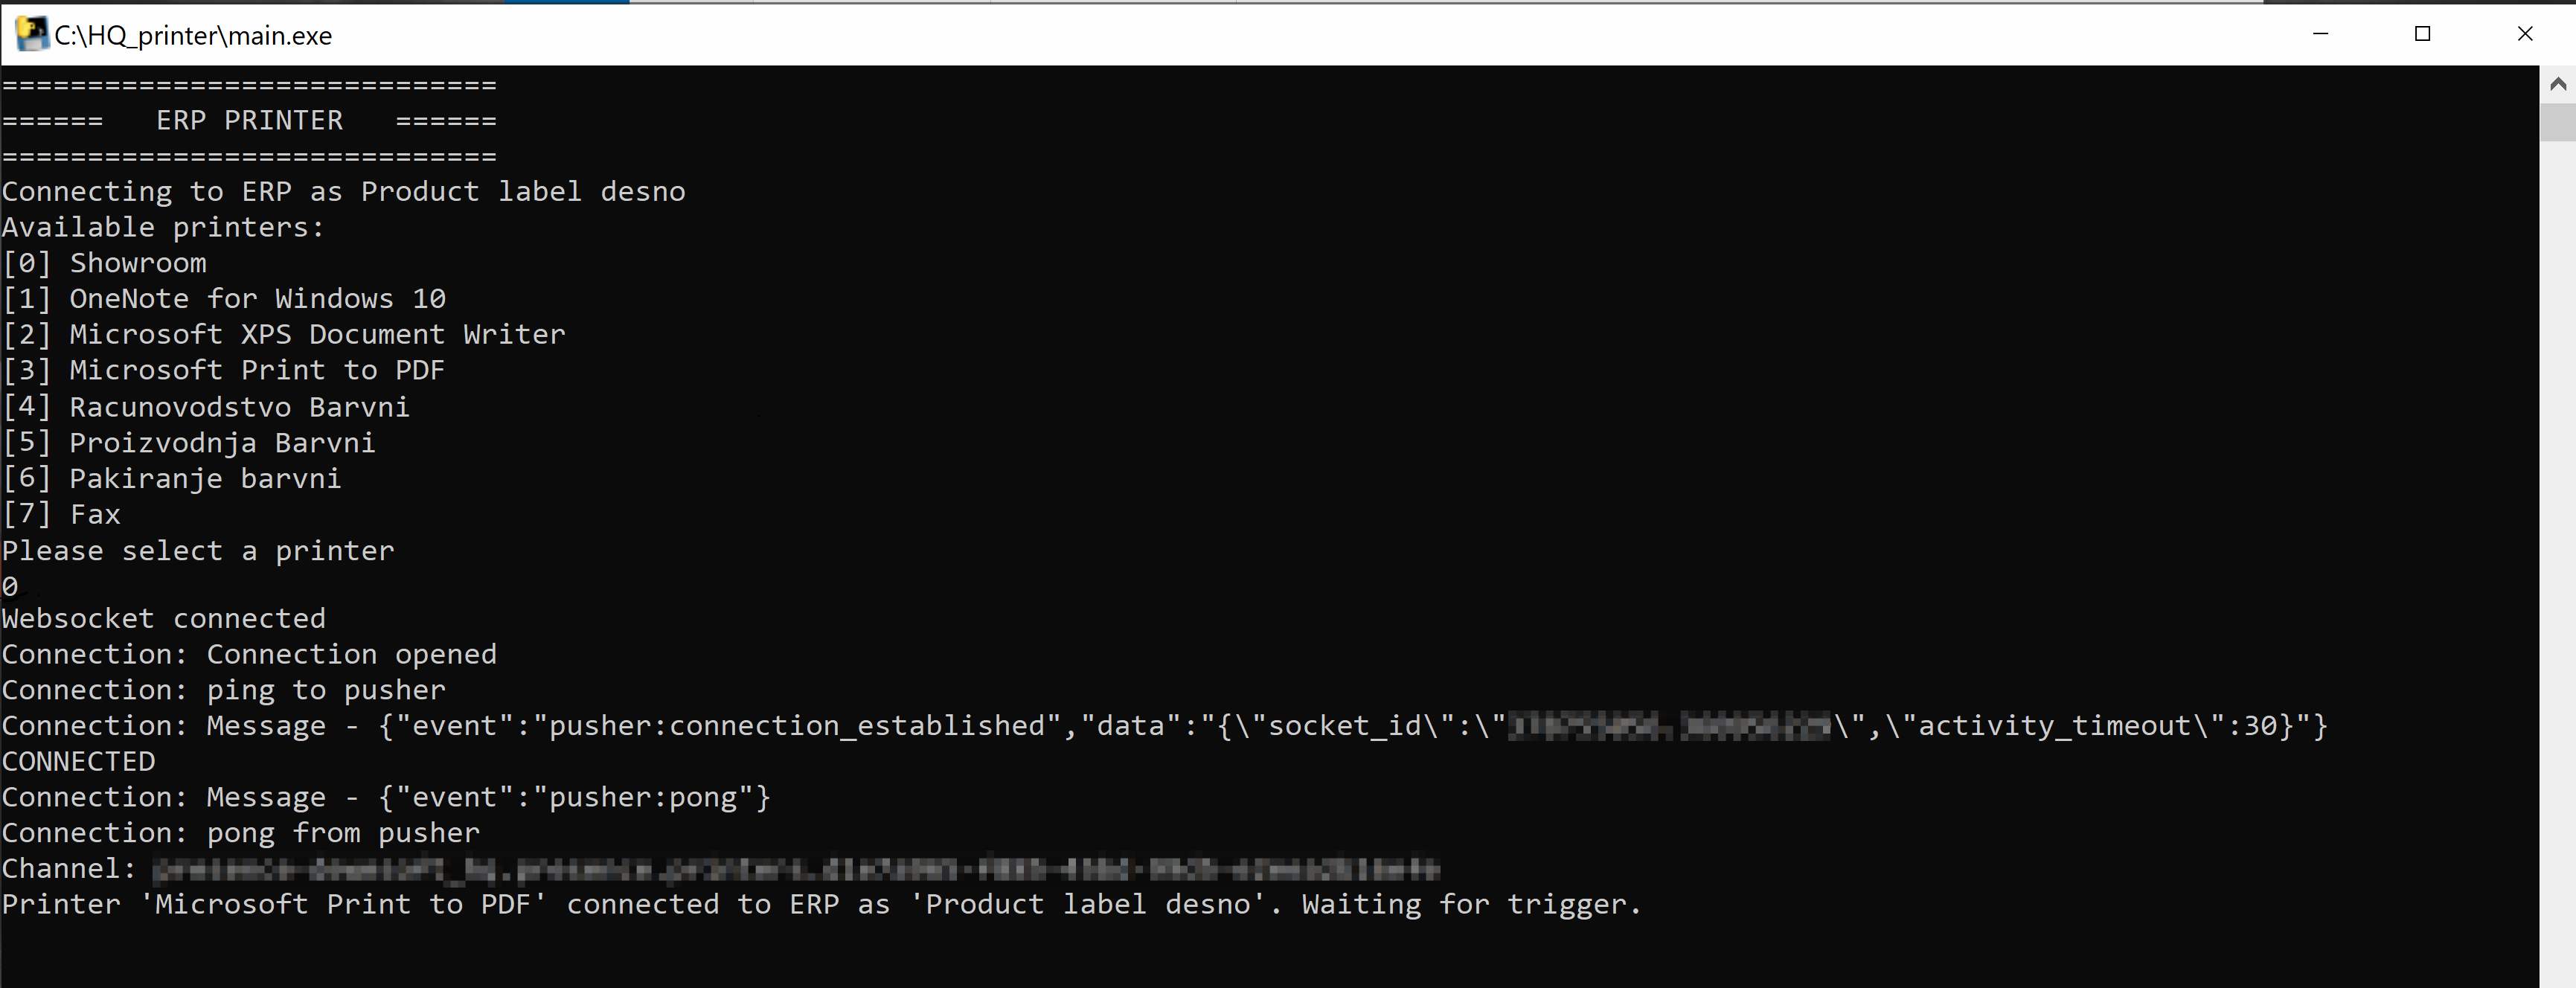
Once you find your printer on the list, enter its corresponding number (e.g. 0) when prompted. This will select the printer (e.g. Showroom) and connect to it. A successful connection attempt will generate a "Websocket connected" response, like on the image below.