
Setting up new printer
To setup a new printer, the ERP Printer application is required.
First-time setup
For first-time setup, try to find the "ERP Printer Software" options in the "options" table. This options should have the software saved in its file manager.
If you can't find the option or its file manager is empty, you will have to contact Web team for assistance with acquiring ERP Printer application and setting up of the application ERP authentication.
First-time setup also requires the creation a "Printer User", that the ERP Printer application will use to listen for printing jobs.
This user's credentials are needed in printer software's setup, so it has to be created beforehand. The user also requires the "join-printers-presence-channel" permission.
Add a new printer in ERP
The first thing to do is to create a new printer entry via the "printers" table create form.
After the printer has been created, copy its "secret", it will be required for ERP Printer software setup.
ERP Printer Setup
Connect the physical printer to the computer, where it will be located and perform the actual printer's setup, including installing correct drivers...
Open the "ERP Printer software" option and its file manager. The file manager should contain 3 separate operating-system-named archives. Download the archive for your computer's operating system and extract it to a "safe" location.
Safe location - a folder on your computer that won't be deleted or moved.

Windows
Open the extracted folder and start the "ERP Printer Setup" program. This will open a windows and prompt you to enter credentials , that will be used to authenticate the application with your ERP.
The entered credentials are saved into the "Windows credentials manager" and read from there during application runtime.
- Client ID
- The ID of authentication client, that will be used to authenticate the application.
- Client secret
- The corresponding authentication client's secret.
- User email
- The email of Printer User, which allows the printer application to listen for printing jobs.
- User password
- The password for the Printer User account.
Once the credentials have been entered, the application will create a shortcut for the printer on your menu and add it to the computer's startup list.
After completing the setup, open the .env file and add the missing information. It should contain at least the following data.
# Run as a background service
RUN_AS_BACKGROUND_SERVICE=true

# ERP's API URL
ERP_API_URL=

# Printers secret from ERP
ERP_PRINTER_SECRET=

# Auto-select a printer by name instead of being prompted.
PRINTER_NAME=
Once all this information has been defined, you can perform a test run by opening the "ERP Printer" file. If all information has been correctly entered, you should get the following notification:
Printer 'Your-selected-printer' connected to ERP as 'Your-Printer-Name-In-ERP'. Waiting for trigger.
You can now attempt to print a document from the ERP to your selected printer.
Linux
Open the extracted folder and open the .env file. Fill in the necessary credentials, which will be used to authenticate and connect the printer application with your ERP.
Your .env file should have all of these filled out:
# Run as a background service
RUN_AS_BACKGROUND_SERVICE=true

# Printer User credentials
ERP_USERNAME=
ERP_PASSWORD=

# Authentication client credentials
ERP_CLIENT_ID=
ERP_CLIENT_SECRET=

# ERP's API URL
ERP_API_URL=

# Printers secret in ERP
ERP_PRINTER_SECRET=

# Auto-select a printer by name instead of being prompted.
PRINTER_NAME=
Once the authentication information has been entered, save the .env file and start the "ERP Printer" application. After a successful connection to the ERP, a notification will appear:
Printer 'Your-selected-printer' connected to ERP as 'Your-Printer-Name-In-ERP'. Waiting for trigger.
After that, you can close the terminal.
If you want to setup run-on-startup, this has to be done manually via the operating system tools.
Mac
The Mac install process is the same as Linux.
Once you find your printer on the list, enter its corresponding number (e.g. 0) when prompted. This will select the printer (e.g. Showroom) and connect to it. A successful connection attempt will generate a "Websocket connected" response, like on the image below.
Printer Label Setup
When the printer software - ERP connection is established, the printer's use can be defined in the options table, in the "printer_buttons" option. Configure the new printer (for labels or normal prints) in the "data" field.
{
  "printProductLabel": {
    "title": "Printer desno",
    "layout": "no-margin-label-printer",
    "template": "label",
    "printer_id": 1,
    "background-color": "#FFFF00"
  }
}
Additional
One started, the printing software will always prompt you to select a printer, to which it should connect and send printing jobs.
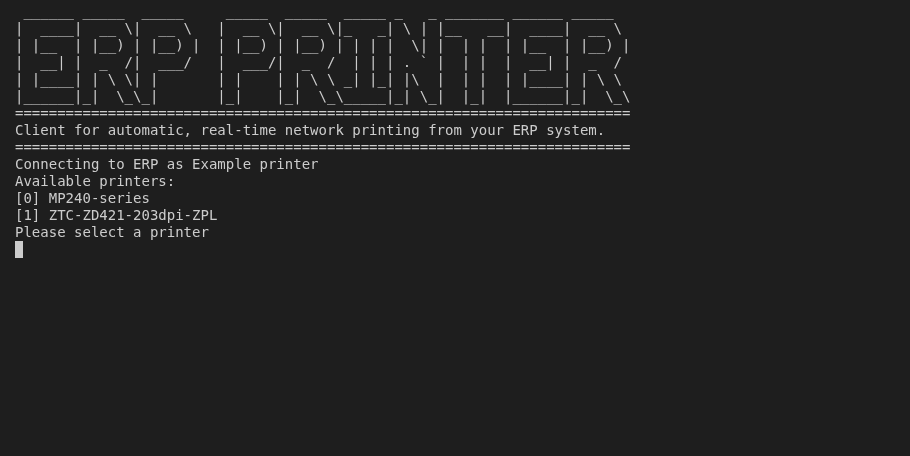
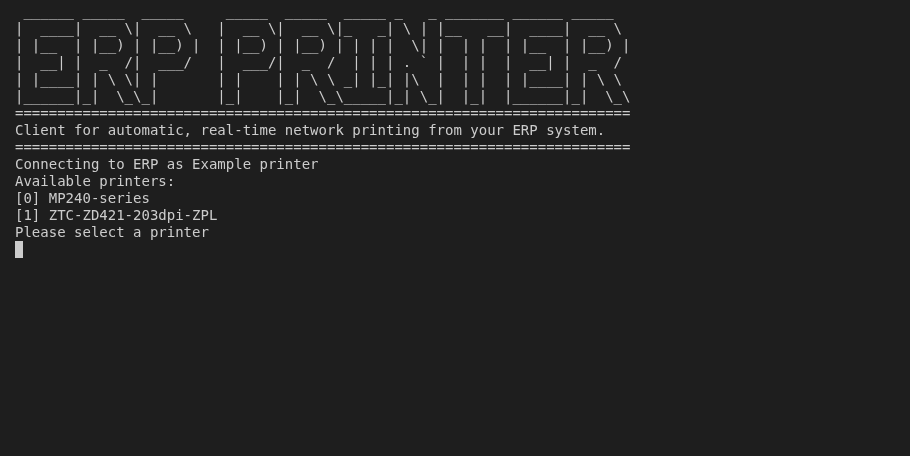
You can edit the environment file so that the "Available printers" selection gets skipped and a select printer is chosen automatically. To do this, copy the printer's name from the list and add it in the following line in the environment (.env) file, then save it.
PRINTER_NAME="printer name"If restarted, the ERP Printer program will now automatically select the pre-selected printer.