Create a new announcement
This action requires the "create announcement" permission.
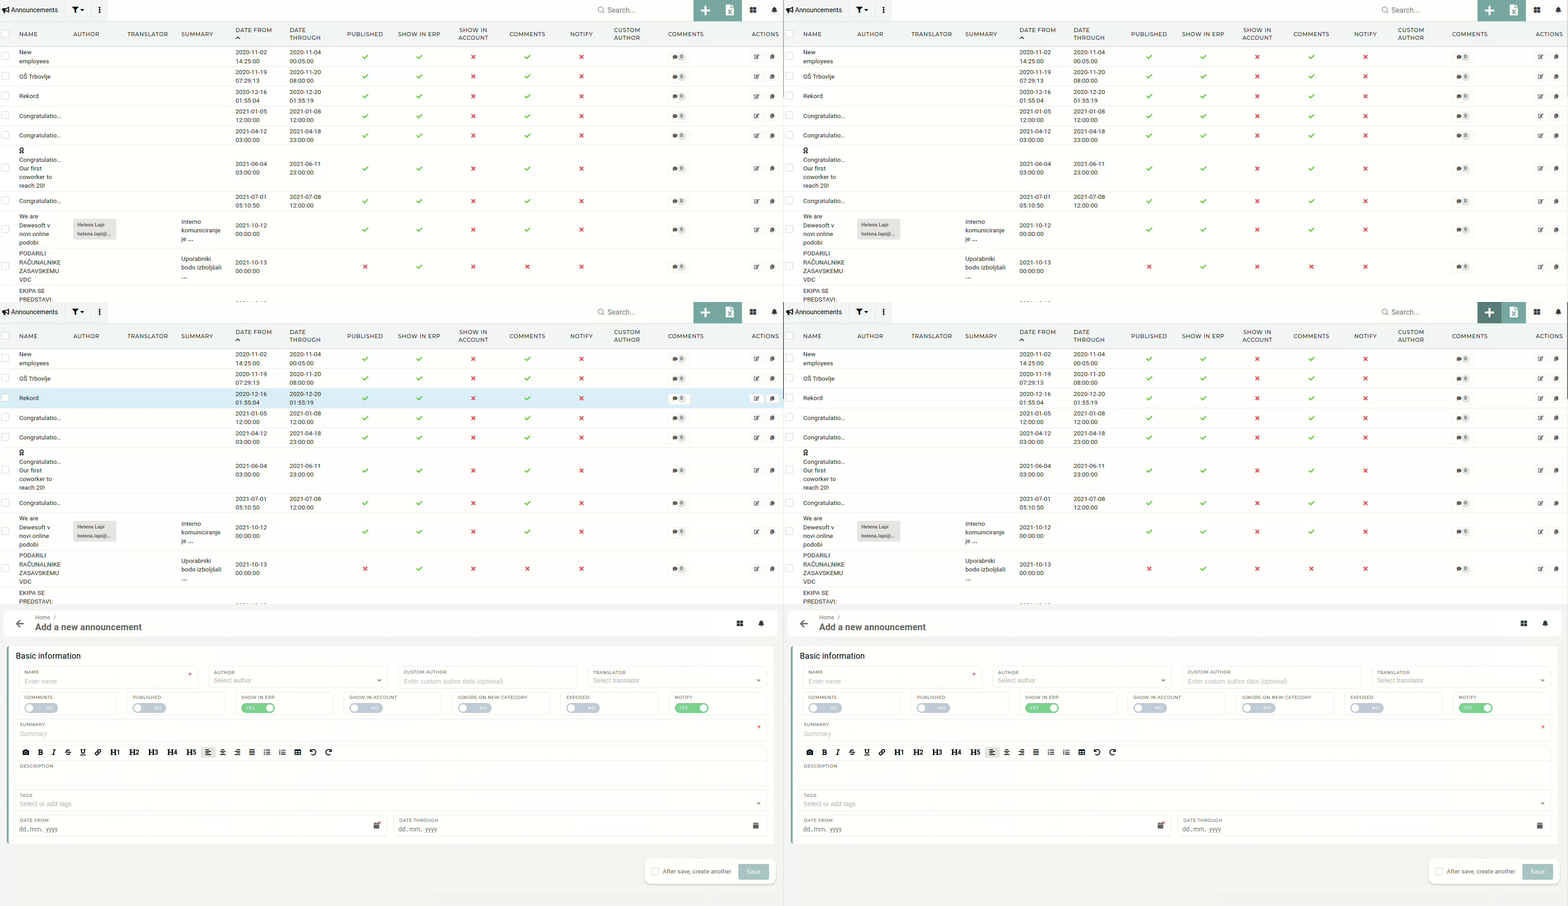
To create a new announcement, you have to click on the "+" button on the right, above the announcements table. This redirects you to the "Add new announcement form".

The actual body of the announcement is added in the "Description" field, which can be edited with the integrated text editor.
When creating a new announcement, the first required thing to add is the announcement's title.

Author

In rare cases, when the announcement author does not have an account, the author's full name can be written into the "Custom author" field.
If the announcement is translated, the translator should be credited. The translator can be selected from the drop-down menu.

Set visibility and publish
Once the announcement is finished, it will only appear, when "Published" is switched to "Yes". To show the announcement on the ERP dashboard, the "Show in ERP" toggle must also be set to "Yes".

When "Ignore on new category" toggle is set to "Yes", the new announcement will not appear in the "NEW" category on ERP dashboard. When "Exposed" toggle is set to "Yes", a published announcement will appear in the NEW category as the big, centered announcement.

If you want to notify users about the new announcement, switch "Notify" to "Yes".
Lastly, a date has to be defined, from which forward the announcement will be visible. At least the "Date from" field must be added. If the "Date through" is also added, the announcement will be hidden after that date has passed.

Adding announcement tags

Adding the announcement avatar
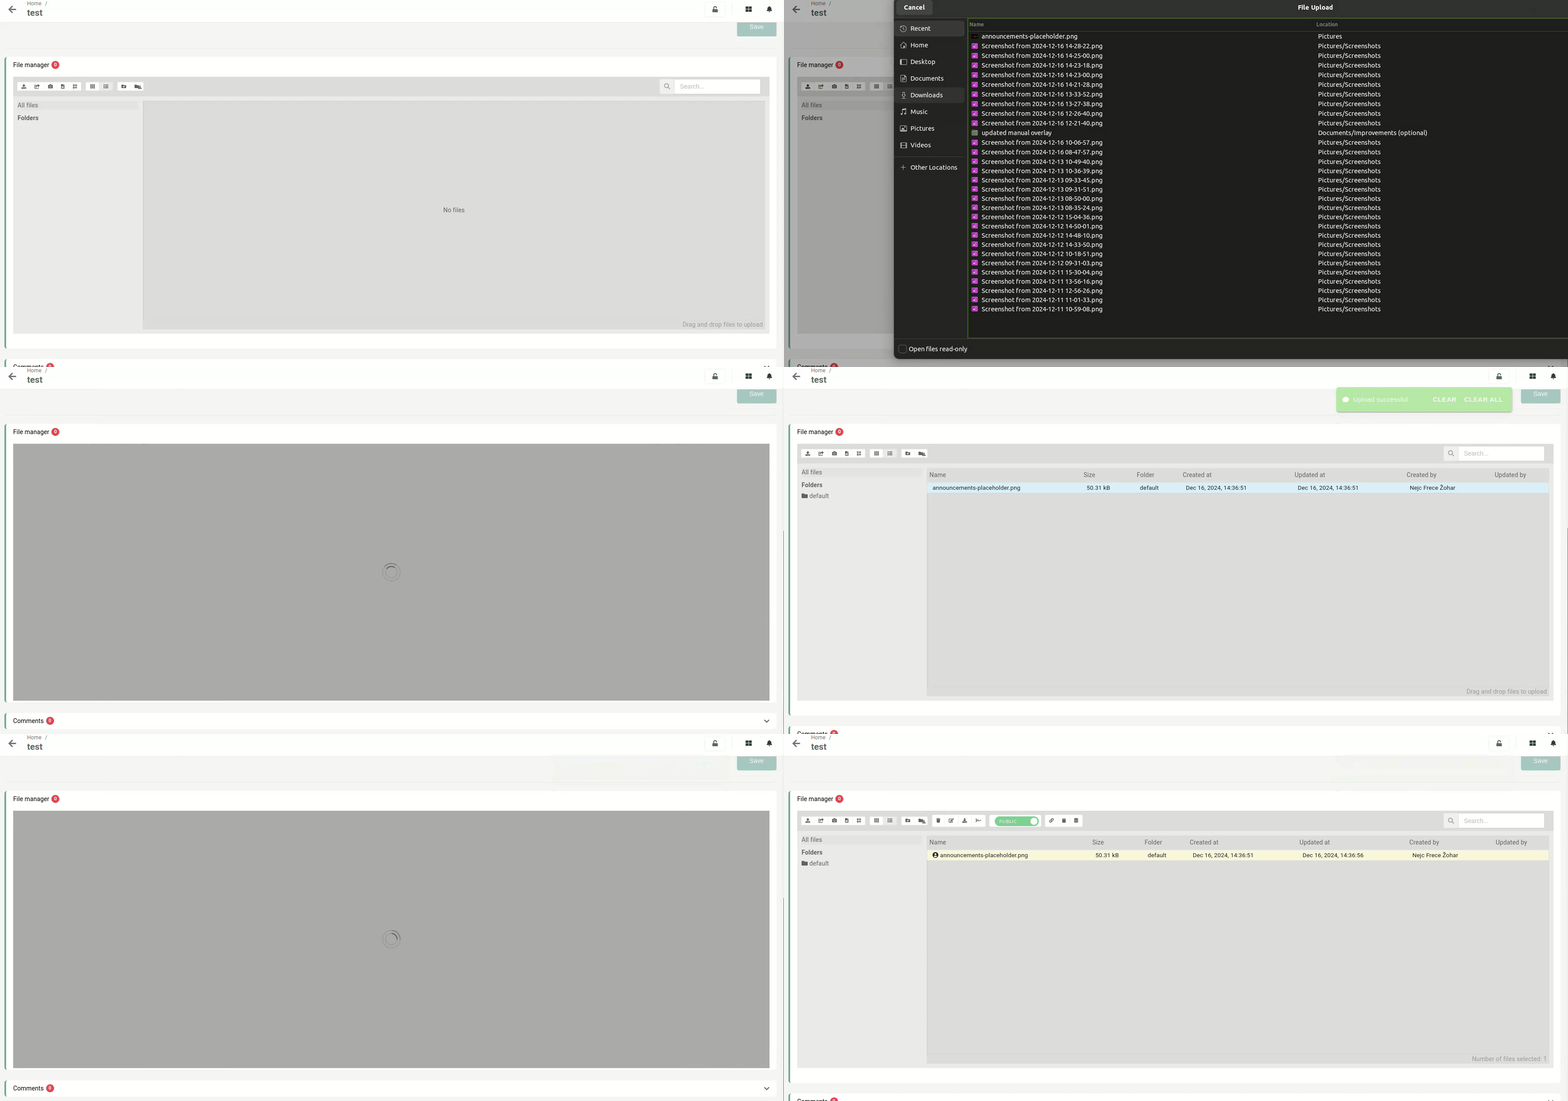
Once the announcement is created, the avatar image can be added.
Upload the avatar photo into the announcement's file manager. Once the image is uploaded, select it and click the "Set as avatar" button. The selected photo will be set as the avatar and shown in the dashboard newsletter.

A viable announcement requires at least a title (name), a summary and the date from when to show it.
